No-Bake Pumpkin Pie Cheesecake is a dessert that captures the heart of autumn with its luscious creaminess and warmly spiced pumpkin flavors. Inspired by the nostalgic scent of fall baking and the ease of a no-fuss planning, this recipe blends the silky smoothness of cheesecake with classic pumpkin pie spices-creating a comforting treat perfect for cozy evenings or festive gatherings.
Prep and Cook Time
- Preparation: 20 minutes
- Chilling Time: 4 hours (or overnight for best results)
Yield
- Serves 8-10 generous slices
Difficulty Level
- Easy – No baking required, ideal for beginners and seasoned bakers alike
Ingredients that Bring Autumn Flavors to Life
- 1 ¾ cups graham cracker crumbs (or spiced ginger snaps for added warmth)
- 6 tbsp unsalted butter, melted
- 16 oz cream cheese, softened
- 1 cup canned pumpkin puree (100% pumpkin, not pie filling)
- ¾ cup powdered sugar, sifted
- 1 ½ tsp pure vanilla extract
- 1 tsp ground cinnamon
- ½ tsp ground ginger
- ¼ tsp ground nutmeg
- ⅛ tsp ground cloves
- 1 cup heavy whipping cream, chilled
- ¼ cup granulated sugar
- Optional garnish: toasted pecans, whipped cream, or a dusting of cinnamon
Step-by-Step Guide to a Smooth, No-Bake Cheesecake Base
- prepare the crust: In a medium bowl, mix the graham cracker crumbs with melted butter until evenly moistened. press firmly into the base of a 9-inch springform pan using the back of a spoon for an even, compact crust. Chill in the refrigerator while preparing the filling.
- Beat the cream cheese: In a large mixing bowl, beat softened cream cheese with an electric mixer on medium speed until creamy and free of lumps, about 2-3 minutes.
- Add pumpkin and spices: Blend in pumpkin puree, powdered sugar, vanilla extract, and all the spice blend-cinnamon, ginger, nutmeg, and cloves-until smooth and well combined. The aromatic spices will infuse every bite with those quintessential autumn notes.
- Whip the cream: In a chilled bowl, whip heavy cream with granulated sugar until stiff peaks form. this ensures a light and fluffy texture that balances the dense cheesecake mixture.
- fold the whipped cream: Gently fold the whipped cream into the pumpkin mixture using a spatula, preserving the airy texture. Be careful not to overmix.
- Assemble and chill: Pour the filling over the set crust, smoothing the top with a spatula. Cover with plastic wrap and refrigerate at least 4 hours or overnight to firm up.
tips for Perfecting the Pumpkin Spice Blend
- Balance is key. Avoid overpowering your mixture with one spice-measure carefully to capture the warm, fragrant harmony of autumn.
- Use fresh,high-quality spices. Ground spices lose potency quickly; consider grinding whole cinnamon sticks or nutmeg for the freshest flavor.
- Customize your blend: feel free to add a hint of allspice or cardamom for a subtle twist that sets your cheesecake apart.
- Test as you go: Before folding in whipped cream, you can taste a small spoonful of pumpkin mixture to adjust sweetness or spice levels.
Creative Serving Suggestions to Elevate Your Dessert Experience
- top with whipped cream and chopped toasted pecans for added crunch and creamy contrast.
- Drizzle warm caramel or maple syrup over each slice to enhance sweetness and add visual appeal.
- Sprinkle with cinnamon or a pinch of pumpkin pie spice right before serving for an inviting aroma.
- Serve alongside spiced apple cider or a rich coffee latte to complete the cozy autumn vibe.
- For a festive touch, garnish with edible gold leaf or candied ginger pieces, transforming the simple cheesecake into a show-stopping centerpiece.
| Nutrient | Per Serving (1 slice) |
|---|---|
| Calories | 320 kcal |
| Protein | 5 g |
| Carbohydrates | 28 g |
| Fat | 20 g |
Chef’s Notes: Tips for Success
- Softened cream cheese is essential-avoid lumps by bringing it to room temperature before mixing.
- For a firmer texture, add 1 teaspoon of unflavored gelatin dissolved in 2 tablespoons of warm water to the filling before folding in the whipped cream.
- Make ahead: This cheesecake tastes even better after chilling overnight-perfect for holiday preparation.
- Crust variations: Use gingersnap cookies or pecan pralines crushed for added flavor dimension.
- Allergen-pleasant: Substitute the graham cracker crust with gluten-free cookies and use coconut cream to make a dairy-free version.
explore more pumpkin-inspired desserts to keep the autumn magic alive.
For authoritative spice information and storage tips, visit Spices Inc..

Q&A
Q&A: No-Bake Pumpkin Pie Cheesecake – Easy Autumn Delight Recipe
Q1: What makes a No-Bake Pumpkin Pie Cheesecake diffrent from a traditional pumpkin pie?
A1: Unlike the classic pumpkin pie that requires baking a delicate custard filling, the no-bake pumpkin pie cheesecake combines creamy cheesecake texture with the warm spices of pumpkin pie-all without turning on your oven. It’s a luscious, chilled dessert that’s perfect for those who crave autumn flavors but prefer a hands-off approach in the kitchen.
Q2: Is this recipe suitable for beginners?
A2: Absolutely! This recipe is designed to be foolproof and beginner-friendly. No oven? No problem. with simple steps like mixing, layering, and chilling, even the most novice bakers can whip up a festive fall treat that looks and tastes remarkable.
Q3: What ingredients are essential for capturing the autumn flavor in this cheesecake?
A3: The magic lies in a blend of pumpkin puree, warm spices like cinnamon, nutmeg, and ginger, and creamy cheesecake filling. A touch of vanilla extract and brown sugar adds depth, while a graham cracker crust grounds all those flavors with its buttery crunch.
Q4: How long dose the cheesecake need to chill before serving?
A4: Patience is a virtue here! For the perfect sliceability and flavor melding, it’s best to chill the cheesecake for at least 4 hours, though overnight chilling is recommended. This allows the cheesecake to set firmly and the spices to infuse fully, creating that melt-in-your-mouth autumn delight.
Q5: Can I customize the crust or toppings?
A5: Definitely! While a classic graham cracker crust is ideal for its sweet and slightly nutty notes, you can swap in ginger snaps or pecan crusts for a seasonal twist. For toppings,consider dollops of whipped cream,a sprinkle of cinnamon,or even caramel drizzle to elevate your cheesecake into a showstopper.
Q6: Is this dessert kid-friendly and family-approved?
A6: Without a doubt! The smooth,creamy texture combined with festive pumpkin spice appeals to kids and adults alike. Plus, because there’s no oven involved, it’s a fun recipe to make together as a family autumn activity.
Q7: Can I make this cheesecake ahead of time for holiday gatherings?
A7: Yes! In fact, this cheesecake shines when prepared in advance.Make it a day or two before your event to save time on the big day and to let those seasonal flavors deepen. Just keep it refrigerated and covered until serving.
Q8: What’s the best way to serve No-Bake Pumpkin Pie Cheesecake?
A8: Serve chilled and sliced with cozy accompaniments like a steaming mug of spiced cider or chai latte. Present it on a festive platter with autumn leaves or cinnamon sticks nearby for an extra seasonal touch.
Q9: Can this recipe be adapted for dietary restrictions?
A9: Yes, you can customize it! Use dairy-free cream cheese and coconut cream to make it vegan, or opt for gluten-free crackers for the crust. Just be mindful of the texture and adjust chilling time if substituting ingredients.
Q10: What’s the secret tip for a perfectly smooth and creamy cheesecake filling?
A10: The key is to soften your cream cheese before mixing and to whip it gently with the sugar and pumpkin puree. Overmixing can introduce air bubbles, so fold in your ingredients carefully to keep that silky, dense texture everyone loves.
This No-Bake Pumpkin Pie Cheesecake recipe is more than just dessert-it’s an embrace of autumn’s cozy essence in every bite. Ready to make your kitchen smell like fall? Let’s get mixing!
To Conclude
As the crisp autumn air settles in and the scent of pumpkin spice begins to weave through your home, this no-Bake Pumpkin Pie Cheesecake offers a simple yet indulgent way to celebrate the season. With its creamy texture, warm spices, and effortless preparation, it’s a dessert that brings the flavors of fall to your table without any fuss. whether you’re hosting a festive gathering or simply craving a cozy treat, this easy autumn delight reminds us that sometimes, the best flavors come together with the least amount of effort. so go ahead-slice into this no-bake wonder and savor the taste of autumn in every luscious bite.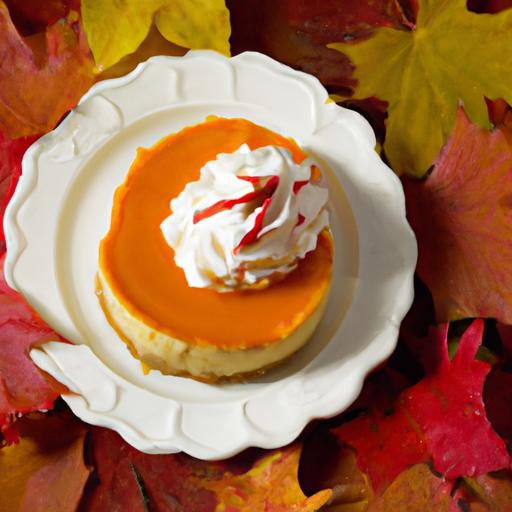
Savor the Flavor: Easy Pesto Chicken Pasta Recipe Delight begins with selecting the freshest, most vibrant ingredients that promise to elevate this classic Italian-American favorite into a colorful and irresistible dish. With its luscious green sauce, tender chicken, and perfectly cooked pasta, this recipe is a celebration of texture and aroma, making it an effortless yet gourmet meal for any day of the week.
Prep and Cook Time
- Readiness: 15 minutes
- Cooking: 20 minutes
- total Time: 35 minutes
Yield
Serves 4 generous portions, ideal for a family dinner or casual entertaining.
Difficulty Level
Easy – Perfect for beginner to home cooks eager to impress with delicious results.
Ingredients
- 12 oz penne or fusilli pasta
- 2 tbsp extra-virgin olive oil
- 2 boneless, skinless chicken breasts (about 1 lb), thinly sliced
- Salt and freshly ground black pepper, to taste
- 3/4 cup fresh basil pesto (homemade or store-bought)
- 1/2 cup heavy cream
- 1/3 cup grated Parmesan cheese, plus extra for garnish
- 2 cloves garlic, finely minced
- 1/4 cup toasted pine nuts
- 1 cup cherry tomatoes, halved
- Fresh basil leaves, for garnish
- Crushed red pepper flakes (optional)
Instructions
- Cook the pasta: Bring a large pot of salted water to a boil. Add the pasta and cook until al dente, about 9-11 minutes. Stir occasionally to prevent sticking. Drain, reserving 1/2 cup of pasta water, and set aside.
- Prepare the chicken: While pasta cooks,heat olive oil in a large skillet over medium-high heat. Season sliced chicken breasts with salt and pepper. Sauté until golden and cooked through, about 5-7 minutes, flipping halfway. Remove chicken from skillet and set aside.
- Create the sauce base: In the same skillet, reduce heat to medium. Add minced garlic and sauté just until fragrant, about 30 seconds-avoid browning.
- Combine pesto and cream: Stir in the fresh basil pesto and heavy cream, mixing gently over low heat until the sauce is smooth and creamy. Add Parmesan cheese and stir until melted and incorporated.
- Bring it all together: Return cooked chicken to the skillet. Add the drained pasta and cherry tomatoes. Toss everything thoroughly to coat the pasta and chicken in the creamy pesto sauce. If needed, add reserved pasta water a tablespoon at a time to loosen the sauce for perfect silkiness.
- Final touches: Sprinkle toasted pine nuts over the pasta and gently fold them in. Adjust seasoning with salt, pepper, and red pepper flakes to taste.
- Serve: Remove from heat and garnish generously with additional Parmesan and fresh basil leaves. Serve promptly for the best flavor and texture.
Tips for Success: Mastering the Perfect Pesto Chicken pasta
- Fresh is best: Using freshly made basil pesto delivers a brighter, more vibrant flavor than jarred varieties. Try our easy homemade pesto recipe for unbeatable freshness.
- Chicken prep tip: For even cooking, pound chicken breasts to a uniform thickness before slicing thinly. This ensures juicy, tender pieces every time.
- Al dente pasta: Trust the package instructions but test 2 minutes before the recommended time. The pasta should be firm to the bite, providing texture balance with the creamy sauce.
- Make-ahead sauce: the pesto cream sauce can be prepared up to 2 days in advance and refrigerated. rewarm gently, adding reserved pasta water to refresh the texture.
- Substitutions: Swap chicken for sautéed shrimp or roasted veggies for a vegetarian twist. use cashew cream for a dairy-free, vegan-friendly sauce.
Creative Serving Suggestions to elevate Your Pesto Chicken Dish
Present your pesto chicken pasta with a sprinkle of toasted pine nuts and a drizzle of high-quality olive oil to add shine and depth. Serve alongside a crisp mixed greens salad tossed in lemon vinaigrette to balance richness. For an extra flavor punch, add roasted sun-dried tomatoes or shaved artichoke hearts on top. Consider pairing with a chilled glass of Pinot Grigio or Sauvignon Blanc to brighten the palate.
For a stunning, resturant-style plate, use a wide shallow bowl and garnish with vibrant edible flowers or microgreens alongside torn fresh basil. A wedge of crusty garlic bread completes this satisfying culinary experience.

| Nutrient | Per Serving |
|---|---|
| Calories | 520 kcal |
| Protein | 38 g |
| Carbohydrates | 45 g |
| Fat | 18 g |
Elevate your weeknight dinners and impress loved ones by embracing the freshness and richness this dish offers. For more adventurous pasta recipes, explore our Bon Appétit recipe collection for inspiration.
Q&A
Q&A: Savor the Flavor – Easy Pesto Chicken Pasta Recipe Delight
Q1: what makes this pesto chicken pasta recipe stand out from others?
A1: This recipe balances simplicity with bold, fresh flavors. The vibrant, herbaceous pesto coats tender chicken and al dente pasta perfectly, delivering a satisfying meal without hours in the kitchen. It’s a delightful fusion of creamy, garlicky pesto and succulent chicken, making every bite a savory adventure.
Q2: Can I make the pesto from scratch, or is store-bought pesto just as good?
A2: Both options work beautifully! Homemade pesto offers that extra burst of freshness-luminous basil, toasted pine nuts, Parmesan, and just the right amount of garlic blended with olive oil. But a high-quality store-bought pesto can save time and still bring plenty of flavor to your dish.
Q3: what type of pasta works best for this recipe?
A3: Classic choices like penne, fusilli, or farfalle are fantastic as their shapes hold onto the pesto sauce well. However, feel free to experiment with your favorites-spaghetti or linguine can give the dish a lighter, more elegant feel.
Q4: How do you ensure the chicken remains juicy and tender?
A4: The secret lies in cooking the chicken over medium heat and avoiding overcooking. Marinating the chicken briefly in a bit of olive oil, lemon juice, and seasoning can also lock in flavor and moisture.When the chicken is just cooked through, it stays juicy and complements the creamy pesto pasta perfectly.
Q5: Can this dish be adapted for vegetarians?
A5: Absolutely! Swap the chicken for hearty vegetables like roasted mushrooms, sun-dried tomatoes, or grilled zucchini. Adding toasted pine nuts or sautéed chickpeas can boost the protein content and keep this dish just as satisfying.
Q6: What side dishes or garnishes pair well with pesto chicken pasta?
A6: A crisp green salad with a tangy vinaigrette complements the richness of pesto pasta beautifully. For garnishes, sprinkle extra Parmesan, toasted pine nuts, or fresh basil leaves to elevate both flavor and presentation.
Q7: Is this recipe freezer-friendly for meal prep?
A7: Pesto chicken pasta is best served fresh to maintain its vibrant flavor and texture. However, you can freeze the cooked chicken and pesto sauce separately. When ready,simply reheat gently and toss with freshly cooked pasta for a quick,flavorful meal.
Q8: How long does it take to prepare and cook this recipe?
A8: From start to finish, it typically takes about 30 minutes-perfect for a weeknight dinner that doesn’t sacrifice taste or quality. Quick to prepare and quick to disappear from the plate!
Ready to dive in? This easy pesto chicken pasta is a delicious ticket to savoring bold Mediterranean flavors with minimal fuss-your taste buds and your schedule will thank you!
Final Thoughts
As the final forkful of this vibrant pesto chicken pasta melts in your mouth, you’ll realize that simplicity and flavor can dance beautifully together on one plate. This easy recipe not only brings comfort to your table but also invites you to savor every herb-infused, garlicky bite. Whether you’re cooking for a busy weeknight or a casual gathering, let this dish be your go-to delight that transforms ordinary ingredients into an unusual meal. so next time hunger calls, remember: with just a handful of fresh ingredients and a touch of culinary joy, you can create a flavorful experience that lingers long after the last bite.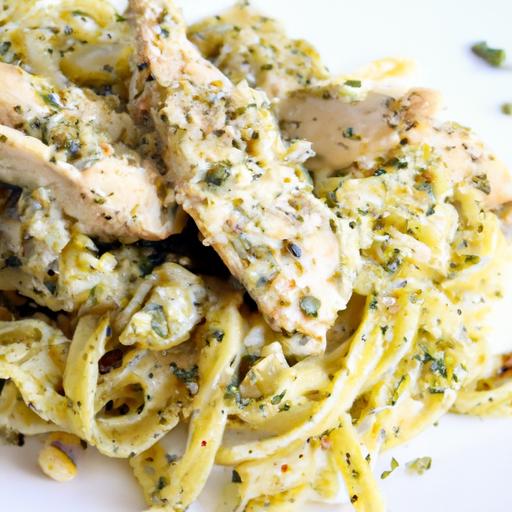
Savor the flavors of this easy shrimp and broccoli stir fry delight by mastering a sauce that perfectly harmonizes savory, sweet, and tangy notes.The essence of this dish lies in its fresh ingredients, vibrant textures, and a sauce that marries every bite with umami-rich satisfaction. Whether you’re craving a quick weeknight dinner or aiming to impress at a casual gathering, this balanced sauce elevates simple ingredients into a memorable culinary experience.
Prep and Cook Time
Prep: 15 minutes | Cook: 10 minutes | Total: 25 minutes
Yield
Serves 4 generously
Difficulty Level
Easy
Ingredients
- 12 oz raw shrimp, peeled and deveined
- 3 cups broccoli florets, fresh and crisp
- 2 tbsp vegetable oil (or avocado oil for higher smoke point)
- 3 cloves garlic, minced
- 1 tbsp fresh ginger, finely grated
- 1/4 cup low-sodium soy sauce
- 2 tbsp oyster sauce
- 1 tbsp hoisin sauce
- 1 tbsp rice vinegar
- 1 tsp toasted sesame oil
- 1 tbsp honey or maple syrup
- 1/4 cup chicken broth or water
- 1 tsp cornstarch mixed with 2 tsp water (slurry)
- Freshly cracked black pepper to taste
- 1-2 green onions, thinly sliced, for garnish
- Sesame seeds, toasted, for garnish
Step-by-Step Instructions
- Prepare the sauce: In a small bowl, whisk together soy sauce, oyster sauce, hoisin sauce, rice vinegar, sesame oil, honey, and chicken broth until well combined. Set aside.
- Cook the broccoli: Heat 1 tbsp of vegetable oil in a large wok or nonstick skillet over medium-high heat. Add broccoli and stir-fry for 3-4 minutes until bright green and slightly tender but still crisp. Remove broccoli and set aside.
- Sauté aromatics: Add the remaining 1 tbsp oil to the wok. Toss in minced garlic and grated ginger; stir constantly for 30 seconds until fragrant but not browned.
- Cook shrimp: Add shrimp to the wok and stir-fry until they turn pink and opaque, about 3-4 minutes. Be careful not to overcook, or shrimp can become rubbery.
- Combine ingredients: Return the broccoli to the wok with the shrimp. Pour the prepared sauce over the top.
- Thicken the sauce: Stir the cornstarch slurry, then add it to the wok while stirring. Keep stirring until the sauce thickens and coats the shrimp and broccoli evenly,about 1-2 minutes.
- Final touches: Season with freshly cracked black pepper to taste. Remove from heat and transfer to serving plates.
- Garnish: Sprinkle sliced green onions and toasted sesame seeds over the top for a vibrant finish.
Tips for Success
- Freshness matters: Choose firm, translucent shrimp and crisp, vibrant broccoli for the best flavor and texture.
- Don’t overcrowd your pan: Cook shrimp and broccoli in batches if necessary to maintain high heat,ensuring even searing and avoiding steaming.
- Adjust sweetness and saltiness: Modify honey or soy sauce quantities based on your taste preference or dietary needs.
- Make ahead: Prepare the sauce in advance to save time. Store shrimp and broccoli separately and combine just before serving.
- Option proteins: Swap shrimp for chicken breast or tofu when desired, adjusting cooking times accordingly.
- Gluten-free option: Use tamari or coconut aminos in place of soy sauce to accommodate gluten sensitivities.
Serving Suggestions and Pairings to Elevate Your Meal
This shrimp and broccoli stir fry delight pairs exquisitely with steamed jasmine or brown rice to soak up the luscious sauce. For a lighter option, serve over quinoa or cauliflower rice. A drizzle of fresh lime juice just before serving adds a bright contrast,while a sprinkle of crushed red pepper flakes brings a touch of heat.
Complement this dish with a simple cucumber salad dressed in rice vinegar and sesame oil or a mild miso soup for a well-rounded Asian-inspired feast. To elevate presentation, consider serving in rustic stone bowls, garnished with fresh cilantro and extra toasted sesame seeds for visual and flavor depth.

| Nutrient | Per Serving |
|---|---|
| Calories | 280 kcal |
| Protein | 28 g |
| Carbohydrates | 15 g |
| Fat | 8 g |
For more inspiration, explore our collection of quick Asian stir fry recipes.To deepen your knowledge about the health benefits of broccoli and shrimp,visit this Healthline nutritional guide.
Q&A
Q&A: Savor the Flavors – Easy Shrimp and Broccoli Stir Fry delight
Q1: What makes shrimp and broccoli stir fry a go-to dish for busy weeknights?
A1: Shrimp and broccoli stir fry strikes the perfect balance between nutrition, speed, and flavor. Shrimp cooks rapidly, broccoli adds vibrant crunch and nutrients, and the whole dish comes together in under 30 minutes. It’s a wholesome,satisfying meal without the fuss-ideal for hectic evenings when time is precious.Q2: How can I ensure my shrimp stays tender and juicy in the stir fry?
A2: The secret lies in quick, high-heat cooking. Shrimp only need about 2-3 minutes per side before they turn opaque and curl up.Overcooking leads to rubbery textures, so keep your wok or pan blazing hot and stir fry swiftly to lock in shrimp’s natural sweetness and tenderness.
Q3: Any tips for keeping the broccoli bright green and crunchy?
A3: Absolutely! Blanch broccoli florets in boiling water for just 1-2 minutes before plunging them into ice water to halt cooking.this “shock” keeps the color vivid and the texture crisp.Then, toss it in the stir fry briefly to absorb all the flavorful sauce without losing that satisfying snap.Q4: What kind of sauce elevates this dish to a restaurant-quality experience?
A4: A harmonious sauce blends savory soy sauce, a hint of sweetness from honey or brown sugar, a touch of garlic and ginger for warmth, and a slight kick from chili flakes or fresh chili.Balancing salty,sweet,tangy,and spicy notes makes every bite burst with bold flavor that complements shrimp and broccoli perfectly.
Q5: Can I customize this stir fry for different dietary preferences?
A5: Definitely! Swap shrimp for tofu or chicken to cater to vegetarians or meat lovers. Use tamari or coconut aminos for a gluten-free twist. Amp up the veggies with bell peppers, snap peas, or mushrooms for extra color and nutrition. The stir fry canvas is versatile-let your creativity spice things up.
Q6: What are some foolproof steps to prevent the stir fry from turning soggy?
A6: To keep it crisp and delightful, avoid overcrowding the pan-cook in batches if needed to maintain high heat. Use minimal sauce initially and add more as you go, allowing it to thicken slightly and coat ingredients without drowning them. serve immediately to enjoy the dish at its freshest.
Q7: How can I serve and pair this dish for a complete meal?
A7: For a wholesome feast, plate your shrimp and broccoli stir fry over steamed jasmine rice, quinoa, or even cauliflower rice for low-carb flair.Pair with a light Asian-inspired salad or miso soup to round out textures and flavors. A chilled green tea or citrusy white wine also makes a refreshing partner to this vibrant dish.
Dive into the delightful simplicity of shrimp and broccoli stir fry,where quick cooking meets rich flavor-perfect comfort food that excites the senses and nourishes the soul. Happy cooking!
Key Takeaways
As you bring this vibrant shrimp and broccoli stir fry to your table, you’re not just serving a meal-you’re sharing a harmony of flavors that’s both nourishing and excitingly simple. This dish proves that a few fresh ingredients, combined with straightforward techniques, can create a dinner that delights the senses and fuels the body. So next time you crave a quick yet satisfying bite, remember that savoring the flavors of this easy stir fry is just a pan away from turning an ordinary evening into a deliciously memorable experience. Happy cooking and even happier savoring!
Ingredients That Bring Flavor and Simplicity to Your No-Bake Treat
easy No-Bake Peanut Butter Oatmeal Cookies Recipe Delight begins with a handful of simple, wholesome ingredients that combine to create a rich, chewy texture full of flavor. The magic lies in the harmony between creamy peanut butter,hearty old-fashioned rolled oats,and a hint of natural sweetness from honey or maple syrup. A splash of vanilla extract infuses warmth and depth, while a pinch of salt enhances every bite without overpowering the gentle nuttiness. These pantry staples make for an effortless blend, allowing you to whip up a nourishing snack in minutes, no oven needed.
Prep and Cook Time
- Preparation: 10 minutes
- chilling: 30 minutes
- Total Time: 40 minutes
Yield
- Approximately 20 cookies
Difficulty Level
- Easy - perfect for beginners and busy bakers alike
Ingredients
- 1 cup creamy peanut butter (natural preferred, no added sugar)
- 1/2 cup honey or pure maple syrup
- 1 teaspoon vanilla extract
- 1/4 teaspoon fine sea salt
- 2 cups old-fashioned rolled oats
- Optional add-ins: 1/3 cup mini chocolate chips, 1/4 cup chopped nuts (pecans, walnuts), or 2 tablespoons ground flaxseed
Step-by-Step Guide to Perfectly Blended Peanut Butter Oatmeal Cookies
- Warm the peanut butter and honey: In a medium microwave-safe bowl, gently warm the peanut butter and honey in 20-second increments, stirring between each, until the mixture is smooth and easily combined.
- Add vanilla and salt: Stir in the vanilla extract and sea salt evenly, ensuring every bite is balanced with depth.
- Incorporate the oats: Gradually stir the rolled oats into the wet mixture,folding gently until all oats are fully coated and the dough starts to come together.
- Add optional mix-ins: If using chocolate chips, nuts, or flaxseed, fold them in now for added texture and flavor bursts.
- Shape the cookies: Using a tablespoon or small cookie scoop, portion out the dough onto a parchment-lined baking sheet. Press each mound down lightly with the back of a spoon to form a cookie shape.
- Chill to set: Refrigerate the cookies for at least 30 minutes until firm but chewy.
- Serve and enjoy: Transfer cookies to an airtight container or arrange beautifully on a serving platter.
Tips for Customizing Texture and sweetness to Suit Your Taste
- Texture: for chewier cookies,use old-fashioned oats rather than fast-cooking varieties. Adding a tablespoon of melted coconut oil can lend a softer bite, while extra oats create a heartier crunch.
- Sweetness: Adjust honey or maple syrup quantity to your preference. For a less sweet treat, reduce to 1/3 cup or swap honey for mashed ripe banana to introduce natural sugars and moisture.
- Nut Butter Alternatives: Swap peanut butter for almond or cashew butter for nuanced flavor profiles without sacrificing creaminess.
- Vegan Version: Use pure maple syrup and ensure your oats are certified gluten-free and vegan-friendly.
- Binding Tips: If your mixture feels too loose, add a tablespoon of ground flaxseed or chia seeds to help set the cookies firmly.
Creative Serving Ideas to Elevate Your Cookie Experience
- Cookie Sandwiches: Layer your cookies with a scoop of vanilla or chocolate ice cream for an indulgent no-bake dessert.
- Drizzle Elegance: Warm some dark chocolate and drizzle over the cooled cookies for added decadence and visual appeal.
- Nut Butter Dip: Serve alongside a small bowl of warming peanut butter or honey yogurt dip to complement flavors and add moisture.
- Fruit Pairings: Fresh slices of banana or crisp apple wedges create a refreshing contrast that balances the rich nuttiness.
- Portable Snack Packs: Arrange cookies in mason jars or reusable snack bags for on-the-go energy boosts, perfect for lunchboxes or travel.

Chef’s Notes & Tips for Success
- Make Ahead: Cookies keep well in an airtight container in the fridge for up to one week or freeze for up to 3 months.
- Binding Issue: If cookies crumble,add a few extra teaspoons of warm peanut butter or a splash of plant milk to bind.
- Oat Flour Substitute: For a smoother texture, pulse oats briefly in a food processor to create oat flour before mixing.
- Skip the Chill: If you’re in a rush, 15 minutes in the freezer will firm the cookies sufficiently.
- Allergy-Friendly: Substitute sunflower seed butter for peanut butter to accommodate nut allergies.
| Nutrient | Per Cookie (approx.) |
|---|---|
| Calories | 110 kcal |
| Protein | 4 g |
| carbohydrates | 12 g |
| Fat | 6 g |
For more wholesome no-bake dessert inspirations, explore our No-Bake Dessert Recipes Collection. To deepen your understanding of peanut butter’s nutritional benefits, visit the Healthline Peanut Butter Nutrition Guide.
Q&A
Q&A: Easy No-Bake Peanut Butter Oatmeal Cookies Recipe delight
Q1: What makes this peanut butter oatmeal cookie recipe so special?
A1: This recipe is a delightful twist on classic cookies-no oven required! It combines creamy peanut butter with hearty oats, creating a chewy, sweet treat that’s quick to whip up.Perfect for when you want homemade goodness without the wait or the heat.
Q2: How long does it take to make these no-bake cookies?
A2: From start to finish, these cookies come together in about 15 to 20 minutes. No baking means no preheating or cooling down the oven. Just mix, scoop, chill, and enjoy!
Q3: what ingredients do I need for this recipe?
A3: The magic happens with simple pantry staples: peanut butter (creamy or chunky), rolled oats, honey or maple syrup, a touch of vanilla extract, and sometimes a sprinkle of salt or cinnamon for extra flavor. Optional add-ins like chocolate chips or chopped nuts can elevate the delight.
Q4: Can I customize the texture of these cookies?
A4: Absolutely! For chewier cookies, use old-fashioned rolled oats. Want a bit more crunch? Add chopped nuts or use chunky peanut butter. Adjusting the amount of sweetener and peanut butter can also make the cookies softer or firmer to your preference.
Q5: Are these cookies kid-friendly and nutritious?
A5: Definitely! They’re a wholesome snack packed with protein and fiber thanks to the oats and peanut butter. Plus, since there’s no baking involved, kids can safely help with mixing and shaping the cookies-a fun and tasty kitchen adventure.
Q6: How should I store no-bake peanut butter oatmeal cookies?
A6: keep them fresh by storing in an airtight container in the refrigerator. They typically last up to a week, but they’re usually devoured much sooner! You can also freeze them for longer storage.
Q7: Can I make these cookies vegan or allergy-friendly?
A7: Yes! Swap honey for maple syrup or agave nectar to keep it vegan. For nut allergies, try using sunflower seed butter instead of peanut butter, and double-check your oats are gluten-free if needed. These cookies are flexible and fun to adapt.
Q8: what’s the best way to serve these cookies?
A8: Serve chilled for a refreshing,chewy bite. They pair wonderfully with a glass of cold milk, a cup of coffee, or tea. great for lunchboxes, quick snacks, or whenever a little peanut buttery happiness is needed.
Enjoy your effortless, no-bake peanut butter oatmeal cookie delight-simple to make and impossible to resist!
to sum up
And there you have it-a simple, no-fuss recipe that turns humble ingredients into a delightful treat. These no-bake peanut butter oatmeal cookies are proof that you don’t need a hot oven or hours in the kitchen to satisfy your sweet tooth. Whether you’re looking for a quick snack, a kid-friendly dessert, or a wholesome indulgence, this recipe has you covered. So go ahead, whip up a batch, and enjoy the perfect blend of creamy peanut butter and hearty oats-no baking required, just pure cookie joy!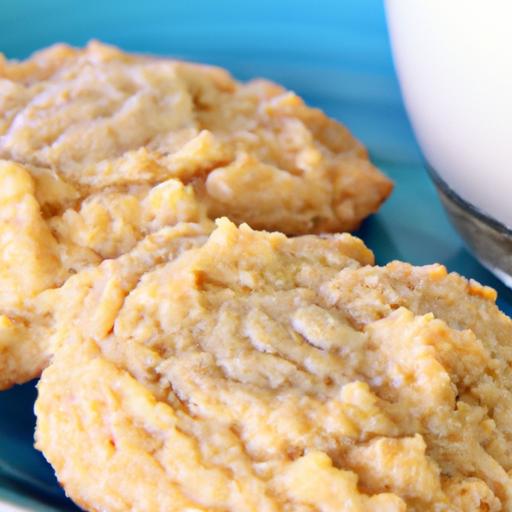
Tropical Twist: Easy Coconut Pineapple Rice Recipe Delight brings a refreshing blend of lush coconut cream and sweet pineapple, evoking island vibes in every bite. this vibrant dish celebrates the harmony of tropical flavors, inspired by customary Southeast Asian and Caribbean cookery, where rice forms the heart of many comforting meals. Whether served as a side or centerpiece, this recipe is approachable for all home cooks, delivering an authentic taste that’s both nostalgic and new.
Prep and Cook Time
- Preparation: 10 minutes
- Cooking: 25 minutes
- Total Time: 35 minutes
Yield
Serves 4 generously.
Difficulty Level
Easy – perfect for weeknight dinners or weekend gatherings.
Ingredients
- 1 ½ cups jasmine rice,rinsed until water runs clear
- 1 cup coconut milk,full fat for creaminess
- 1 cup water
- 1 cup fresh pineapple,diced into ½-inch cubes
- 2 tablespoons shredded unsweetened coconut,toasted
- 1 tablespoon coconut oil or neutral vegetable oil
- 1 teaspoon salt
- 1 tablespoon maple syrup or honey,optional for extra sweetness
- 2 green onions,thinly sliced,for garnish
- Fresh cilantro,for garnish
- 1 small red chili,thinly sliced (optional,adds warmth)
Instructions
- Prepare the rice: In a medium saucepan,combine the rinsed jasmine rice,coconut milk,water,salt,and maple syrup (if using). Stir gently to mix without disturbing the rice bed. Bring to a gentle boil over medium heat.
- Simmer: Lower the heat to the smallest flame, cover with a tight-fitting lid, and cook for 15 minutes without lifting the lid. This traps steam, cooking the rice perfectly fluffy.
- Rest: Turn off the heat and let the rice rest, still covered, for an additional 10 minutes to absorb all moisture evenly.
- Toast coconut and pineapple: While the rice rests, warm the coconut oil in a large skillet over medium heat. Add the diced pineapple and cook for 3-4 minutes until it caramelizes lightly, stirring gently to avoid sticking.
- Add shredded coconut: Toss in the toasted shredded coconut and stir for another 1-2 minutes to release its natural oils and aroma.
- Fluff and combine: Fluff the cooked rice with a fork, then fold in the pineapple-coconut mixture.Be gentle to keep the rice grains separate and fluffy.
- Garnish and serve: Transfer the rice to a serving bowl. Sprinkle with sliced green onions,fresh cilantro,and optional red chili slices for a pop of color and spice.
Tips for Success
- Rinsing rice: This step is crucial to remove excess starch and prevent clumping, ensuring each grain cooks light and fluffy.
- Coconut milk choice: Use a high-quality, full-fat coconut milk for the richest flavor and texture. Avoid “light” versions that may result in a watery rice.
- Customize sweetness: Adjust the sweetness by skipping or adding more maple syrup based on your pineapple’s ripeness.
- Make-ahead tip: Prepare the rice ahead and gently reheat on low with a splash of coconut milk to revive creaminess.
- Substitutions: Swap jasmine rice for basmati for a nutty aroma or use frozen pineapple chunks thawed if fresh is unavailable.
Creative Serving Suggestions to Elevate Your Dish
This coconut pineapple rice is a versatile tropical showcase. serve it alongside grilled shrimp or jerk chicken to amplify island flavors. For a vegetarian option, pair with a fresh mango salsa or black bean salad. Elevate presentation by plating in hollowed-out pineapple halves or colorful banana leaves.Garnish further with toasted cashews or macadamia nuts for delightful texture contrasts. A drizzle of lime juice at the table awakens brightness and ties all elements together beautifully.
| Nutrient | Per Serving |
|---|---|
| Calories | 320 kcal |
| Protein | 4 g |
| Carbohydrates | 56 g |
| Fat | 8 g |

For more tropical inspirations, check out our Caribbean Inspired Recipes. To understand more about the health benefits of coconut milk, visit Healthline.
Q&A
Q&A: Tropical Twist – Easy Coconut Pineapple Rice Recipe Delight
Q1: What makes this Coconut pineapple rice recipe a “tropical twist”?
A1: The magic lies in the blend of sweet, juicy pineapple chunks infused with creamy coconut milk, transforming ordinary rice into a vibrant, island-inspired dish. It evokes the sunny beaches and lush palms of the tropics with every bite, making your taste buds feel like they’re on a mini getaway!
Q2: Is this recipe complex or time-consuming?
A2: Not at all! This recipe is designed to be rapid and easy, perfect for busy weeknights or casual gatherings. With simple ingredients and straightforward steps, you’ll have a colorful, flavorful meal on the table in under 30 minutes.Q3: Can I use regular rice, or is there a special type for this dish?
A3: While jasmine rice is ideal because of its fragrant, slightly floral aroma that complements the coconut and pineapple, you can use any long-grain rice you have on hand. Just make sure to rinse it well and adjust the cooking time if needed.
Q4: How do the coconut and pineapple flavors balance in this dish?
A4: The creamy richness of coconut milk provides a smooth base, while the pineapple adds a tangy sweetness and a subtle burst of acidity. The two create a harmonious contrast that’s both comforting and refreshing, making the rice delightfully complex yet approachable.Q5: Can this recipe be adapted for dietary preferences, like vegan or gluten-free?
A5: Absolutely! This recipe is naturally vegan and gluten-free as it relies on plant-based ingredients without any wheat or animal products. For extra protein, consider topping with toasted cashews or pairing with grilled tofu or shrimp.
Q6: what are some creative ways to serve or garnish this Coconut Pineapple Rice?
A6: Try sprinkling chopped fresh mint or cilantro for a pop of green and herbal brightness. A squeeze of lime juice adds a zesty kick, while toasted coconut flakes offer extra crunch and aroma. it’s also fantastic as a side dish to spicy jerk chicken or as a base for tropical-inspired bowls.
Q7: Can I make this dish ahead of time? How should I store leftovers?
A7: Yes, you can prepare the rice in advance and store it in an airtight container in the fridge for up to 3 days. To reheat, sprinkle a few drops of water over the rice and warm gently on the stovetop or microwave to keep it moist and fluffy.
Q8: What inspired the creation of this Coconut Pineapple Rice recipe?
A8: Inspired by the vibrant flavors of island cuisines and the desire for a simple yet exciting twist on plain rice, this recipe celebrates the easy pleasures of tropical ingredients. It’s all about bringing sunshine and a burst of flavor to your everyday meals.
Closing Remarks
As the sweet, creamy flavors of coconut dance effortlessly with the shining, tangy notes of pineapple, this Tropical Twist rice recipe invites you to bring a slice of island paradise into your kitchen. Simple to prepare yet bursting with vibrant taste,it transforms an everyday side dish into a delightful escape for your palate. Whether paired with grilled seafood, spicy curries, or enjoyed on its own, this easy coconut pineapple rice is more than just a recipe-it’s a flavorful reminder that a little tropical charm can brighten any meal. So go ahead, give your dinner table a sunny makeover and let your taste buds set sail on this flavorful voyage.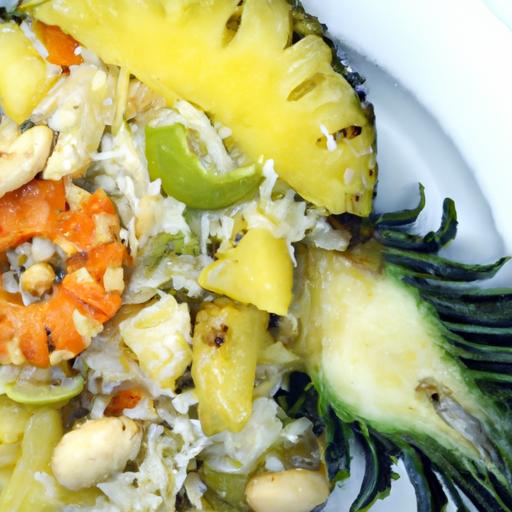
Sizzle & Serve: Easy Shrimp Stir Fry Recipe for Busy Nights
Sizzle & Serve: Easy Shrimp Stir Fry Recipe for Busy Nights captures the vibrant essence of quick home cooking with restaurant-quality flavor. Inspired by bustling Asian street food markets, this dish combines succulent shrimp with crisp vegetables, all enveloped in a sauce that sings with savory, tangy notes. Whether you’re short on time or craving an effortless meal packed with flavor, mastering this recipe will elevate your weeknight dinners and impress anyone lucky enough to taste it.
Prep and Cook Time
Preparation: 10 minutes
Cooking: 12 minutes
Total Time: 22 minutes
Yield
Serves 4 hungry diners
difficulty Level
Easy – Perfect for beginners and seasoned cooks craving simplicity without skimping on taste
Ingredients
- 1 pound large shrimp, peeled and deveined (tails on or off, based on preference)
- 2 tablespoons vegetable oil or peanut oil, divided
- 1 red bell pepper, thinly sliced
- 1 cup snap peas, trimmed
- 3 garlic cloves, minced
- 1-inch piece fresh ginger, grated
- 3 green onions, chopped (separate white and green parts)
- ½ cup low-sodium soy sauce
- 2 tablespoons oyster sauce
- 1 tablespoon honey or brown sugar
- 1 teaspoon toasted sesame oil
- 1 teaspoon cornstarch mixed with 2 tablespoons cold water (slurry)
- Freshly ground black pepper, to taste
- Optional: Red chili flakes or fresh sliced chili for heat
Instructions
- Choose the perfect shrimp: Select fresh or thawed large shrimp that are firm with a mild sea aroma.The freshness enhances both flavor and texture,ensuring the shrimp stay tender with a slight snap after cooking.
- Prepare the stir fry sauce: In a small bowl, whisk together soy sauce, oyster sauce, honey, sesame oil, and pepper. This balance of umami and sweetness will become the backbone of your dish’s flavor.
- Heat 1 tablespoon oil in a large wok or skillet over medium-high heat until shimmering but not smoking.
- Stir fry the shrimp: Add shrimp and the white parts of the green onions to the hot pan. Sauté until shrimp turn pink and opaque, about 2-3 minutes per side depending on size. Remove shrimp and set aside. Avoid overcooking to maintain a juicy texture.
- Sauté aromatics and veggies: Add remaining oil, then garlic, ginger, red bell pepper, and snap peas. Stir continuously, cooking 3-4 minutes until vegetables are crisp-tender and vibrant.
- Combine shrimp and sauce: Return shrimp to the pan. Stir sauce again and pour over the shrimp and vegetables. Toss everything together to coat evenly.
- Thicken the sauce: Pour the cornstarch slurry into the mixture and stir constantly for 1-2 minutes until the sauce thickens and glazes the ingredients beautifully.
- Finish and garnish: Sprinkle chopped green parts of green onions on top. add chili flakes if desired for extra kick. Serve immediately over steamed rice or noodles for maximum satisfaction.
Chef’s Notes: Tips for Success
- Frozen shrimp: Thaw thoroughly in cold water and pat dry to prevent steaming rather than sautéing.
- Vegetable swaps: Feel free to substitute snap peas with sugar snap peas or snow peas, and switch bell pepper for broccoli florets to suit your pantry.
- Sauce variations: add a splash of rice vinegar or a teaspoon of chili garlic sauce to add complexity.
- Make-ahead: Prepare the sauce in advance and store in an airtight container up to 3 days.
- Cooking tip: Ensure your wok or skillet is very hot before adding shrimp and veggies-this sears ingredients, locking in flavor and texture.
Serving Suggestions
Plate your shrimp stir fry alongside steamed jasmine rice or fluffy brown rice for a wholesome meal. Alternatively, toss it with cooked rice noodles or soba for a noodle bowl variation. Garnish with freshly chopped cilantro or a sprinkle of toasted sesame seeds for a burst of color and nutty aroma. A wedge of lime on the side will bring out the sauce’s brightness and add a refreshing zing.

Nutrition Facts
| Nutrient | Per Serving |
|---|---|
| Calories | 280 kcal |
| Protein | 32g |
| Carbohydrates | 14g |
| Fat | 8g |
Looking for another quick seafood sensation? Check out our Quick Garlic Butter Salmon Recipe for a perfect complementary dish. For deep-dives on the science of shrimp cooking, the Serious Eats guide offers excellent insights.
Q&A
Q&A: Sizzle & Serve – Easy Shrimp Stir Fry Recipe for Busy Nights
Q1: What makes this shrimp stir fry recipe ideal for busy nights?
A1: This recipe is a lifesaver when time is tight because it’s quick to prep and cook-most of the magic happens in under 20 minutes! With minimal ingredients and simple steps, you get a flavorful, nutritious meal without the kitchen chaos or long wait.
Q2: Can I customize the vegetables in this recipe?
A2: Absolutely! One of the joys of stir fry is its versatility. swap in whatever veggies you have on hand-bell peppers, snap peas, carrots, or broccoli all work beautifully. Just chop them roughly the same size for even cooking.
Q3: How do I ensure the shrimp stays tender and juicy?
A3: The key is high heat and quick cooking. Make sure your pan is hot before adding shrimp; they only need about 2-3 minutes per side. Overcooking turns them rubbery, so watch carefully for that pink, opaque color.Q4: Can I make this recipe gluten-free?
A4: Definitely! Replace soy sauce with tamari or coconut aminos, which are naturally gluten-free. Double-check your other sauces and seasonings, and you have a tasty gluten-free meal in a flash.
Q5: What’s the best way to serve this shrimp stir fry?
A5: Serve it sizzling over steamed jasmine rice, quinoa, or even cauliflower rice for a low-carb twist. Garnish with chopped scallions or sesame seeds for an extra burst of flavor and crunch. Ready,set,sizzle & serve!
Q6: Is this recipe kid-pleasant?
A6: Without a doubt! It’s mild and colorful,perfect for kids’ taste buds. If your little ones prefer less spice, simply dial down any chili or ginger and let the natural sweetness of the shrimp shine through.
Q7: Can I prep ingredients ahead of time?
A7: Prepping is a smart move for busy nights! You can chop veggies and marinade shrimp earlier in the day or even the night before-just keep it refrigerated. When dinner time hits, it’s all about a quick, hot stir fry action!
Ready to sizzle and serve your way to a quick, delicious dinner? This shrimp stir fry recipe is your weekday warrior-simple, speedy, and seriously satisfying!
The Way forward
As the final sizzle fades and your kitchen fills with mouthwatering aromas, you’ll know that quick, delicious dinners don’t have to be complicated. This Easy Shrimp Stir Fry recipe proves that even the busiest nights can be saved with just a handful of fresh ingredients and a little vibrant wok action. So next time the clock is ticking and hunger strikes, remember: a flavorful, nutritious meal is just minutes away with Sizzle & Serve. Get ready to impress your taste buds-and your schedule-with this effortless dinner champion, designed to keep both your energy and your evenings thriving.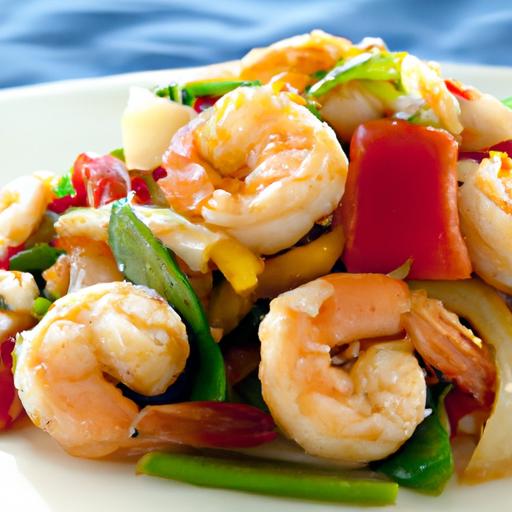
Sizzle and Serve: Easy Shrimp Stir fry Recipe to Try Today begins with choosing the freshest shrimp and vibrant vegetables that bring both vivid color and unbeatable flavor to your pan. Whether you’re a seasoned home cook or diving into Asian-inspired dishes for the first time,mastering the art of quick stir-frying unlocks a world of texture and taste that feels restaurant-quality yet is effortless enough for a weeknight. This dish celebrates simplicity-juicy shrimp that sizzle just right, crisp vegetables that snap with freshness, and a harmonious sauce that ties it all together.
Prep and Cook Time
- Prep Time: 15 minutes
- Cook Time: 10 minutes
- Total Time: 25 minutes
Yield
Serves 4 generous portions
Difficulty Level
Easy – Perfect for beginners and those seeking a speedy, healthy dinner.
Ingredients
- 1 lb fresh shrimp, peeled and deveined (tail-on for presentation or off for ease)
- 2 tablespoons vegetable oil (or peanut oil for higher smoke point)
- 1 red bell pepper, thinly sliced
- 1 cup snap peas, trimmed
- 1 medium carrot, julienned
- 3 cloves garlic, finely minced
- 1 teaspoon fresh ginger, grated
- 3 green onions, sliced thinly, white and green parts separated
- 1/4 cup low-sodium soy sauce
- 1 tablespoon oyster sauce
- 1 teaspoon toasted sesame oil
- 1 tablespoon honey or maple syrup
- 1 teaspoon cornstarch, dissolved in 2 tablespoons cold water
- Freshly ground black pepper, to taste
- Sesame seeds and chopped cilantro for garnish
- Cooked jasmine rice or noodles, to serve
Instructions
- Prepare your shrimp: Pat the shrimp dry using paper towels to ensure a perfect sear. Season lightly with black pepper.
- Mix the sauce: In a small bowl, whisk together soy sauce, oyster sauce, honey, and sesame oil. Set aside.
- Heat the wok or large skillet: Add vegetable oil over medium-high heat until shimmering but not smoking.
- Sauté aromatics: Add minced garlic and grated ginger, stirring constantly for about 30 seconds until fragrant, being careful not to burn.
- Cook shrimp: Add shrimp in a single layer; stir-fry for 2 minutes until edges turn pink and slightly golden. Remove shrimp and set aside to avoid overcooking.
- Vegetable time: Add sliced bell pepper,snap peas,and julienned carrot to the wok. Stir-fry for 3-4 minutes until vegetables are tender-crisp, maintaining their vibrant color and crunch.
- Return shrimp and combine: Toss shrimp back into the wok with vegetables. Pour in the prepared sauce and stir thoroughly.
- Thicken the sauce: Slowly add the cornstarch slurry while stirring, cooking until sauce thickens and clings beautifully to each piece-about 1 minute.
- Finish with green onion whites: Stir in the white parts of green onions for a fresh bite. Remove from heat and sprinkle green parts on top.
- Plate and garnish: Serve promptly over steamed jasmine rice or noodles. Garnish with sesame seeds and fresh cilantro to add freshness and a pop of green.
Tips for Success
- Shrimp selection: Opt for wild-caught or sustainably farmed shrimp with a firm texture and mild aroma for maximum flavor.
- Prep all ingredients beforehand: stir frying is fast-paced- mise en place ensures nothing burns or overcooks.
- High heat is your friend: For that signature sizzle and texture, keep your pan hot but avoid overcrowding, which causes steaming not frying.
- substitutions: Swap oyster sauce for hoisin for a sweeter profile or add chili flakes to amp up heat.
- Make-ahead: Pre-mix the sauce and slice vegetables the day before to reduce active cooking time.
- Vegetable variation: Broccoli florets,baby corn,or bok choy make excellent additions depending on what’s fresh and available.
Serving Suggestions
Present your shrimp stir fry on a warm platter, inviting everyone to dig in straight from the stove. For added elegance, serve with lime wedges to brighten flavors. Crisp cucumber salad or lightly pickled vegetables provide a refreshing counterpoint. A cold glass of crisp white wine or green tea complements the dish’s vibrant flavors beautifully. For a family-amiable twist, serve with fried rice or simple garlic noodles to soak up every drop of the luscious sauce.
| Nutrient | Per Serving |
|---|---|
| Calories | 320 |
| Protein | 35g |
| Carbohydrates | 18g |
| Fat | 8g |

For those looking to expand their stir fry repertoire, don’t miss our Crispy Tofu Stir Fry Guide that complements this dish perfectly. For detailed enduring seafood info, visit the Marine Stewardship Council.
Q&A
Q&A: Sizzle and Serve – Your Go-to Guide for an Easy Shrimp Stir Fry Recipe
Q1: What makes this shrimp stir fry recipe stand out from others?
A1: This recipe strikes the perfect balance between simplicity and flavor. It’s designed for busy weeknights yet delivers a vibrant, restaurant-quality dish.With fresh shrimp, crisp vegetables, and a zingy sauce, it’s a quick sizzle in the pan that ends in a delicious serve on your plate.
Q2: How quickly can I prepare this shrimp stir fry?
A2: From chopping to plating, expect about 20-25 minutes. Shrimp cooks fast (usually 3-4 minutes), so the total time is mostly about prepping your veggies and mixing the sauce. It’s perfect for when you want something wholesome but don’t want to spend hours in the kitchen.
Q3: What vegetables work best in this stir fry?
A3: Crisp, colorful veggies like bell peppers, snap peas, broccoli, and carrots bring texture and nutrition. Feel free to customize-bok choy, baby corn, or mushrooms also play well with shrimp, adding depth and crunch.
Q4: can I make this recipe gluten-free?
A4: Absolutely! Just swap out soy sauce for tamari or coconut aminos, both gluten-free options. This way, you keep all the savory goodness without any gluten concerns.Q5: What’s a simple homemade sauce for this dish?
A5: Combine soy sauce, garlic, ginger, a splash of rice vinegar, honey (or maple syrup), and a teaspoon of sesame oil. This zingy blend coats the shrimp and veggies, giving the dish a sweet-savory kick that’s both comforting and exciting.Q6: Is shrimp the only protein I can use?
A6: Not at all! This stir fry is incredibly versatile. Swap shrimp for chicken, tofu, or even thin slices of beef or pork. The cooking times vary, but the technique and sauce remain your secret weapon.
Q7: Any tips to keep shrimp tender and juicy?
A7: Yes! Whisk the shrimp with a little cornstarch before cooking. This creates a light coating that locks in moisture and helps the shrimp develop a beautiful, slightly crispy exterior without drying out.
Q8: How can I serve this stir fry for a complete meal?
A8: Serve over steamed jasmine or brown rice, or try fluffy quinoa or noodles. Garnish with fresh cilantro, sliced green onions, and a sprinkle of toasted sesame seeds for that wow factor. A wedge of lime adds a luminous finish.
Q9: Can I turn this into a meal prep option?
A9: Definitely! The components reheat well. Cook the shrimp and veggies, then portion with rice or noodles. Keep sauces separate if you want to avoid sogginess. It makes weekday lunches or dinners delightfully easy.
Q10: What’s the best way to “sizzle and serve”?
A10: Preheat your wok or skillet until it’s scorching hot before adding oil. This high heat is crucial-it sears ingredients quickly, locks in flavors, and keeps veggies crisp. Stir constantly and serve immediatly for the freshest bite.
Ready to sizzle and serve? Grab your shrimp and veggies, fire up the pan, and enjoy this easy, flavor-packed stir fry that’s sure to become a kitchen favorite!
Future Outlook
Whether you’re a seasoned home cook or just dipping your toes into the world of stir-fry, this easy shrimp recipe is your ticket to a quick, flavorful meal that sizzles with freshness and satisfaction. Packed with vibrant veggies and succulent shrimp, it’s a dish that not only delights the palate but also fuels your day with wholesome goodness. So next time you’re craving something simple yet sensational, remember: a sizzling skillet and a handful of shrimp can transform dinner into an effortless culinary celebration. Happy cooking-and even happier eating!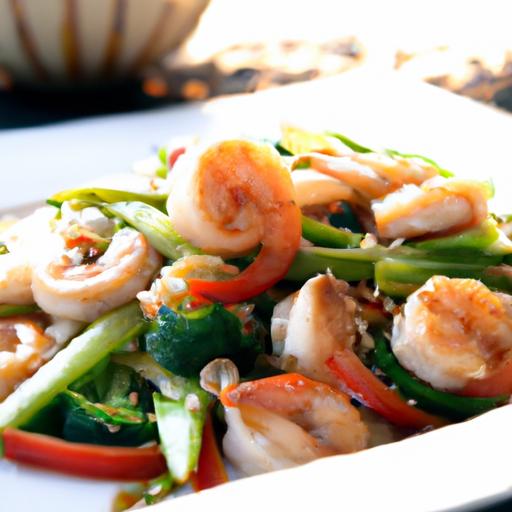
Whip Up Quick & Easy Old Fashioned Salmon Patties Today!
Whip up quick & easy old fashioned salmon patties today and discover how fresh ingredients transform a humble dish into a flavor-packed delight. This classic recipe, inspired by home kitchens across coastal regions, perfectly balances flaky salmon, tender crumbs, and crispy golden exteriors for a truly comforting experience.
Prep and Cook Time
- Planning: 15 minutes
- Cooking: 10 minutes
- Total Time: 25 minutes
Yield
Serves 4 generously (approximately 8 patties)
Difficulty Level
Easy - Perfect for beginners and those craving a homemade meal in under 30 minutes
Ingredients
- 14 oz canned salmon, drained and skin removed
- 1 cup fresh breadcrumbs (preferably made from day-old bread)
- 2 large eggs, lightly beaten
- 1/4 cup finely chopped red onion
- 2 tbsp fresh parsley, chopped
- 1/2 cup mayonnaise
- 1 tbsp Dijon mustard
- 1 tbsp lemon juice, freshly squeezed
- 1 tsp Old Bay seasoning (optional but highly recommended)
- Salt and cracked black pepper, to taste
- 2 tbsp vegetable oil or unsalted butter, for frying
Why Fresh Ingredients Make All the Difference in salmon Patties
There’s a reason fresh ingredients steal the spotlight in the best salmon patties: they bring brightness, texture, and unparalleled fragrance. Fresh parsley and lemon juice awaken the flavor profiles, while crisp, finely chopped onions add subtle crunch. Using fresh breadcrumbs instead of dry processed ones lends a delicate fluffiness to each patty, ensuring a tender bite that’s not too dense. And of course, fresh salmon-even canned-popped with natural oils creates moistness that’s key to avoiding dry, crumbly patties. It’s this balance of fresh, vibrant components that elevates your salmon patties from ordinary to outstanding.
Mastering the Perfect Texture for Fluffy and Crispy Patties
Balancing moisture and binding agents is the secret to patty perfection. Too wet,and your patties fall apart; too dry,and they become tough. The eggs serve as a natural binder, while mayonnaise adds creaminess without excess moisture. Fresh breadcrumbs absorb just enough liquid for structure but keep the texture light. When shaping your patties, gently form them-avoid compacting too much-to invite a fluffy interior. Achieving that golden brown crust comes down to the right pan temperature and patience: moderate heat allows the outside to crisp evenly without burning, locking in everything delicious inside.
Top Flavor Boosters to Elevate Your Old Fashioned Salmon Recipe
Beyond salt and pepper, enhance your salmon patties with these flavor boosters:
- Old Bay seasoning: Instantly imparts classic seafood warmth and depth
- Dijon mustard: Adds tangy sharpness that cuts through richness
- Fresh dill or chives: Substitute parsley for an herby twist
- Celery seed or finely diced celery: For a subtle textural crunch and earthiness
- A dash of hot sauce: If you like a gentle heat balance
Quick Cooking Techniques for a golden Brown Finish Every Time
To get perfectly golden salmon patties, heat your skillet over medium heat and add oil or butter, ensuring a thin, even layer coats the pan. Carefully add your patties without overcrowding-this creates enough space for air to circulate and crisp the edges.
Cook each patty for about 4-5 minutes on one side until beautifully browned, then carefully flip using a thin spatula and repeat.Resist the urge to move or press down on the patties; letting them sit undisturbed encourages golden crusts. If the oil starts to smoke, lower the heat to prevent burning. Transfer finished patties to a paper-towel-lined plate to drain excess oil for that perfect lightness.
Instructions
- Prepare the salmon: In a medium bowl, flake the canned salmon with a fork, removing any skin or large bones for a smooth texture.
- Mix the base: Add the fresh breadcrumbs, chopped red onion, parsley, eggs, mayonnaise, Dijon mustard, and lemon juice.
- Season: Incorporate Old Bay seasoning, salt, and pepper. Stir gently until combined, being careful not to overmix.
- Form patties: Shape the mixture into 8 equal-sized patties, about 3 inches wide and 3/4 inch thick. Place on a parchment-lined tray.
- Heat the pan: Warm vegetable oil or butter in a skillet over medium heat until shimmering.
- Fry the patties: Cook patties in batches without crowding, about 4-5 minutes per side, until golden brown and crispy.
- Rest and serve: Transfer patties to a paper towel-lined plate to drain. Serve warm with your favorite sides or sauces.
Chef’s Notes
- For a gluten-free version, substitute the fresh breadcrumbs with gluten-free crackers or almond flour.
- Make-ahead tip: Form patties and refrigerate up to 24 hours before cooking to deepen flavors and make last-minute cooking easier.
- If patties feel too fragile, add a tablespoon more mayonnaise or an extra half egg to improve binding.
- Instead of canned salmon, try freshly cooked salmon for an even more vibrant flavor profile.
Serving Suggestions
Salmon patties shine when paired with crisp, fresh sides. Serve atop a bed of peppery arugula, alongside creamy coleslaw or tangy tartar sauce. Garnish with lemon wedges and a sprinkling of extra chopped parsley or dill for a fresh finish. slide them into a soft brioche bun for a quick sandwich, or enjoy alongside roasted potatoes or a simple green salad for an easy weeknight meal.

| Nutrient | Per Serving |
|---|---|
| Calories | 320 kcal |
| Protein | 25 g |
| Carbohydrates | 15 g |
| Fat | 18 g |
Looking for more seafood recipes to try? Check out our Simple Lemon Garlic Butter Shrimp, a quick and delicious favorite.For additional insights into the health benefits of salmon, visit Healthline’s Salmon Benefits Guide.
Q&A
Q&A: Whip Up Quick & Easy Old Fashioned Salmon Patties Today!
Q1: What makes an old fashioned salmon patty different from other fish patties?
A1: The charm of an old fashioned salmon patty lies in its simplicity and nostalgia.Unlike modern versions loaded with exotic spices or fancy ingredients, the classic recipe relies on pantry staples-canned salmon, breadcrumbs, eggs, and a few seasonings. It’s a comforting, hearty dish that lets the rich flavor of salmon shine through with a crispy, golden crust.
Q2: How can I make salmon patties quickly without sacrificing flavor?
A2: Efficiency and flavor go hand in hand here! Start with canned salmon, which is already cooked and flakes perfectly. Combine it with quick-binding ingredients like eggs and breadcrumbs or crushed crackers. Add finely chopped onions, a pinch of salt and pepper, and a dab of mustard or lemon juice to brighten the taste. From mixing to frying, you can have patties sizzling in under 20 minutes!
Q3: What’s the secret to getting the perfect crispy crust on salmon patties?
A3: Heat is your friend-but patience is key. Use a non-stick skillet with a little oil and make sure it’s hot before adding the patties. Press them gently to flatten, then resist the urge to flip too soon. Let them brown thoroughly on one side; this caramelization locks in flavor and creates that coveted crunch.
Q4: Can I customize old fashioned salmon patties to make them healthier?
A4: Absolutely! swap out regular breadcrumbs for whole wheat or oat crumbs to boost fiber.Use olive oil or avocado oil for frying instead of butter to up the healthy fats. You can also add finely grated veggies like zucchini or carrot to sneak in nutrients without altering the classic vibe.
Q5: What are some quick side dishes that pair well with salmon patties?
A5: Keep it simple and classic: a fresh green salad with vinaigrette, creamy coleslaw, or sautéed greens like spinach or kale. for more comfort-food charm, mashed potatoes or a light lemony rice pilaf complement the patties beautifully.
Q6: Can I make old fashioned salmon patties ahead of time?
A6: Yes! Prepare the patties and refrigerate them for up to 24 hours before frying. If you want to save time on a busy day, fry them in advance and reheat gently in the oven or a skillet. This way, you can have a wholesome, homemade meal ready in minutes.
Q7: Any tips for selecting the best canned salmon for patties?
A7: Look for wild-caught salmon in water or natural juices-these often have better flavor and less sodium then varieties packed in oil or brine.Check for boneless and skinless if you prefer a smoother texture, but a little skin and small bones are edible and add calcium if you’re up for it!
Whip up your batch of old fashioned salmon patties today, and enjoy a taste of comfort and tradition-all in a quick and easy recipe that fits perfectly into your busy life!
Closing Remarks
There you have it-a timeless recipe that proves old-fashioned doesn’t meen old-fashioned to cook. With just a handful of simple ingredients and a few easy steps,these salmon patties deliver big on flavor and comfort without keeping you in the kitchen for hours. Whether you’re whipping them up for a weeknight dinner or a casual brunch, these patties bring a crispy, savory delight that’s sure to become a staple in your recipe rotation. So next time you want something both quick and satisfying, remember: a classic salmon patty is just a few minutes away from turning ordinary ingredients into extraordinary bites. Happy cooking!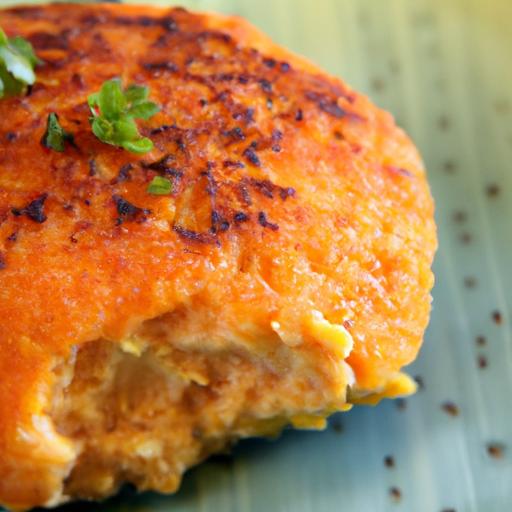
Slow-cooker Buffalo Chicken Dip: Easy Game Day Recipe
The Slow-Cooker Buffalo Chicken Dip is a sumptuous party of creamy richness and fiery heat, making it the ultimate companion for any game day gathering. Born from the iconic flavors of buffalo wings, this dip transforms tender shredded chicken into a luscious, melt-in-your-mouth delight, effortlessly crafted in the slow cooker. Whether you’re a seasoned host or a casual snacker, this recipe promises consistent, crowd-pleasing results that balance spice and creaminess perfectly.
Prep and Cook Time
- Preparation: 10 minutes
- cook Time: 2 hours on high or 4 hours on low
Yield
Yields approximately 8 servings, perfect for sharing around the TV or at your next party.
Difficulty level
Easy – Ideal for beginner cooks and busy hosts looking for foolproof flavour.
Ingredients
- 3 cups cooked, shredded chicken breast (rotisserie chicken works great)
- 8 oz cream cheese, softened
- 1/2 cup buffalo wing sauce (Frank’s RedHot is a classic choice)
- 1/2 cup ranch dressing or blue cheese dressing, based on preference
- 1 cup shredded sharp cheddar cheese
- 1/2 cup shredded mozzarella cheese
- 2 tbsp chopped fresh parsley or chives for garnish
- Optional: 1/4 cup diced celery for crunch
- salt and freshly ground black pepper to taste
Instructions
- Prepare the slow cooker: Lightly grease the inner pot to prevent sticking if desired.
- Combine base ingredients: In the slow cooker, add the shredded chicken, softened cream cheese, buffalo wing sauce, and ranch (or blue cheese) dressing. Stir gently to blend all ingredients together until creamy and well-integrated.
- Add cheese: Reserve 1/4 cup of the cheddar and mozzarella for topping later. Mix the remaining cheese into the dip evenly.
- Cook low and slow: Cover and cook on low for 4 hours or high for 2 hours,stirring every 30 minutes to prevent burning and ensure an even melt.
- Final touch: About 15 minutes before serving, sprinkle the reserved cheddar and mozzarella evenly on top. Replace the lid and allow cheese to melt until bubbly and golden.
- Garnish & serve: Remove the lid, sprinkle freshly chopped parsley or chives and optional diced celery over the top for a burst of freshness and crunch.
Tips for Success
- Use room temperature cream cheese to speed up melting and ensure a smooth texture.
- If you like your dip extra spicy, add an additional 1-2 tablespoons of buffalo sauce, but balance it with creamy ranch or blue cheese to avoid overpowering heat.
- For a thicker dip, let it cook uncovered for the last 15 minutes to reduce excess liquid.
- Make ahead by assembling everything in the slow cooker insert the night before; refrigerate and cook the next day, adding 30 minutes to cook time if starting cold.
- Swap shredded chicken with shredded rotisserie turkey for a Thanksgiving twist or add finely chopped cooked bacon for smoky depth.
Serving Suggestions
This luscious Slow-Cooker Buffalo Chicken Dip shines best when served piping hot alongside crisp tortilla chips, crunchy celery sticks, or sweet red pepper strips. For a party-ready presentation, transfer the dip to a rustic crock or cast-iron skillet right in the slow cooker base. Top it with extra cheese and fresh herbs before placing it front and center.Pair it with chilled craft beers or crisp white wines to complement the bold flavors.
For game day, create a snack station with your favorite dippers arranged like a spread of flavor and texture contrasts. Don’t forget to have plenty of napkins on hand-the irresistible buffalo glaze tends to get delightfully messy!

Nutritional Information
| Nutrient | Per Serving |
|---|---|
| Calories | 280 kcal |
| Protein | 22 g |
| Carbohydrates | 3 g |
| Fat | 18 g |
Elevate your knowledge and mastery of buffalo-style dips by exploring more about slow cooking techniques here at Food Network. For other crowd-pleasing game day recipes, be sure to check out our Game day Appetizers collection.
Q&A
Q&A: Slow-Cooker Buffalo Chicken Dip – Your Easy Game Day MVP
Q: what makes Slow-Cooker Buffalo Chicken Dip the perfect game day recipe?
A: It’s the ultimate crowd-pleaser-bold, creamy, and spicy all at once. Plus, cooking it in a slow cooker means minimal effort and maximum flavor. Just toss the ingredients in, let it simmer, and your party snack is ready to shine without you missing a single play.
Q: What ingredients do I need for this dip?
A: You’ll want shredded cooked chicken, cream cheese, ranch or blue cheese dressing, buffalo wing sauce, and shredded cheese (cheddar or mozzarella works great). Optional extras include chopped green onions or a sprinkle of paprika for that extra zing.
Q: Can I prepare this dip ahead of time?
A: Absolutely! You can assemble all the ingredients in the slow cooker insert the night before, cover, and refrigerate. When you’re ready, just plug it in and let the magic happen. It’s convenience and deliciousness all wrapped in one.
Q: How spicy is this Buffalo Chicken Dip?
A: The heat level depends on your choice of buffalo sauce. For a milder dip, go easy on the sauce or use a milder variety. If you love bold spice, add extra buffalo sauce or a dash of cayenne pepper. The slow cooker mellows flavors just enough to keep it balanced.
Q: What’s the best way to serve this dip?
A: Serve it warm with sturdy dippers like celery sticks,tortilla chips,pretzels,or even toasted baguette slices. The creamy, spicy dip pairs perfectly with crunchy textures, making every bite a little celebration.
Q: Can I make this recipe healthier?
A: Definitely! Swap regular cream cheese for a lighter version, use Greek yogurt instead of some of the dressing, and opt for baked chips or fresh veggies for dipping. You’ll keep the bold flavors while trimming calories.
Q: Any tips for a fuss-free cooking experience?
A: Keep all your ingredients prepped (like shredding chicken) before game day. Use rotisserie chicken for speed and flavor. Stir occasionally to make sure it heats evenly, and if the dip’s too thick, add a splash of milk or extra dressing until it’s your perfect consistency.
Q: What if I don’t have a slow cooker?
A: No worries! You can bake the dip in an oven-safe dish at 350°F (175°C) for about 20-25 minutes or until bubbly and hot. the slow cooker just adds convenience by freeing up oven space and hands.
Q: How long does this dip last?
A: Stored in an airtight container in the fridge, Buffalo Chicken Dip stays tasty for 3-4 days. Reheat gently in the microwave or stovetop to keep it creamy and delicious.
Q: Can I customize the dip to suit different tastes?
A: Absolutely! Feel free to swap out blue cheese for ranch, add diced jalapeños for extra heat, or mix in some corn or black beans for texture. This dip is a versatile canvas for your flavor creativity. Game on!
In Conclusion
Whether you’re cheering from the couch or hosting the ultimate game day gathering, this Slow-Cooker Buffalo Chicken Dip is your new MVP.With its effortless prep, bold flavors, and creamy texture, it’s the kind of dish that keeps the crowd coming back for more-without keeping you tethered to the kitchen. So next time the game is on, fire up your slow cooker, gather your favorite dipping snacks, and let this spicy, savory dip bring the heat to your celebration. touchdown guaranteed!
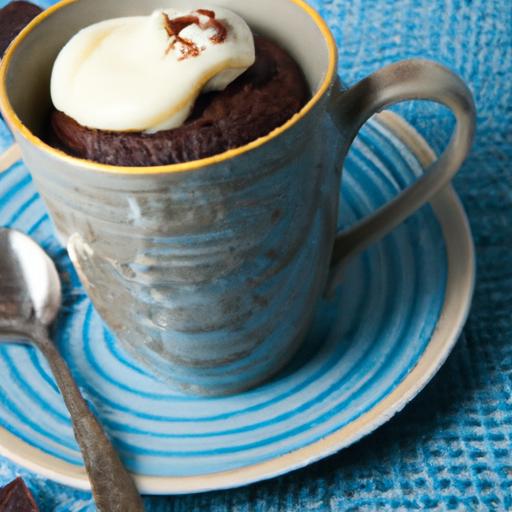
Indulge guilt-free with this luscious sugar-free chocolate mug cake,a quick and satisfying dessert that transforms simple pantry staples into a moist,rich delight.born from the desire for a fast,guiltless treat,this mug cake promises a soft crumb and intense chocolate flavor,all without a single granule of sugar. Whether you’re curbing your sugar intake or simply seeking an easy indulgence, these carefully chosen ingredients pave the way for a flawless, decadent experience that’s ready in minutes.
Prep and Cook Time
Prep Time: 5 minutes | Cook Time: 1 minute 30 seconds
Yield
Serves 1 mug-sized dessert lover
Difficulty Level
Easy - Perfect for beginners and busy cooks alike
Ingredients
- 4 tbsp almond flour (finely ground for a tender crumb)
- 2 tbsp unsweetened cocoa powder (choose Dutch-processed for mellow richness)
- 1/2 tsp baking powder (for gentle rise and fluffiness)
- 1 large egg (at room temperature, provides structure and moisture)
- 3 tbsp unsweetened almond milk (or any plant-based milk)
- 2 tbsp erythritol or preferred granular sugar substitute (adjust to taste)
- 1 tbsp melted coconut oil (boosts moistness and adds richness)
- 1 tsp pure vanilla extract (for aromatic depth)
- Pinch of salt (to enhance chocolate flavor)
step-by-Step Instructions
- Combine dry ingredients: In a microwave-safe mug, whisk together the almond flour, cocoa powder, baking powder, erythritol, and salt until evenly mixed. This ensures a uniform and airy texture.
- Add wet ingredients: Stir in the egg, almond milk, melted coconut oil, and vanilla extract. Mix well until a smooth batter forms, with no dry pockets. The batter should be thick but pourable.
- Microwave carefully: Cook the mug cake on high for 90 seconds. Microwaves vary; if undercooked, heat in additional 10-second bursts to prevent overcooking. The top should be set but soft to the touch.
- Rest and enjoy: Allow the cake to cool for 1 minute – this lets it finish cooking gently and thickens the texture for a perfect bite.
Tips for Success
- Customize your sweetness: Adjust erythritol amounts or try monk fruit sweetener for a milder aftertaste.
- Nut flour alternatives: Substitute almond flour with finely ground oat or coconut flour-but reduce quantity by 25% and add an extra egg to maintain moisture.
- Avoid overcooking: Microwave ovens unevenly cook; monitor the cake closely. A slightly underdone center ensures moistness.
- make ahead: Mix dry ingredients in advance for a quick grab-and-mix mug cake anytime.
- Add-ins: Toss in a few sugar-free chocolate chips or chopped nuts before microwaving for texture contrast.
Serving Suggestions
Elevate your sugar-free chocolate treat by topping it with a dollop of unsweetened whipped cream or a spoonful of full-fat Greek yogurt for creaminess. Sprinkle freshly grated dark chocolate or crushed roasted hazelnuts over the top for a gourmet touch. For an extra burst of freshness, add a few raspberries or a mint leaf. Serve your mug cake straight from the mug or gently loosen edges to transfer onto a small dessert plate for a more elegant presentation. Pair with a warm cup of unsweetened green tea or black coffee to balance the richness and savor every decadent bite.
| Nutrient | Per Serving |
|---|---|
| Calories | 280 kcal |
| Protein | 9 g |
| Carbohydrates | 8 g (Net Carbs: 4 g) |
| Fat | 23 g |

Q&A
Q&A: Indulge Guilt-Free with an easy sugar-Free Chocolate Mug Cake
Q: Can I really enjoy chocolate cake without any sugar?
A: Absolutely! This sugar-free chocolate mug cake uses natural sweeteners or sugar substitutes that satisfy your sweet tooth without the sugar spike. It’s all about clever ingredient swaps that keep the richness and flavor intact, minus the guilt.
Q: How quick is this mug cake to make?
A: From start to finish, it takes about 5 minutes-yes, really! Just mix your ingredients in a mug, zap it in the microwave for about a minute, and voilà: a warm, fudgy treat ready to be enjoyed instantly.Q: What ingredients do I need to make it sugar-free?
A: The basic lineup includes unsweetened cocoa powder,almond flour or oat flour,baking powder,an egg or flax egg,a bit of vanilla extract,and your choice of a sugar-free sweetener like erythritol,stevia,or monk fruit. Dark chocolate chips without added sugar can elevate it even more.Q: Can I use regular flour instead of almond or oat flour?
A: You can, but choosing almond or oat flour adds moisture and a subtle nuttiness while keeping it gluten-free and lower in carbs. Plus, they blend beautifully with cocoa’s richness for that perfect texture.
Q: What if I don’t have a microwave?
A: No worries! You can bake your mug cake in a preheated oven at 350°F (175°C) for about 10-12 minutes. Just be sure to use an oven-safe mug or ramekin.
Q: Is this recipe suitable for diabetics?
A: Thanks to the sugar-free sweeteners and low-carb flours, this mug cake offers a dessert option that won’t cause dramatic blood sugar spikes. Though, always consult with your healthcare provider for personalized advice.
Q: How can I customize my mug cake?
A: Get creative! add chopped nuts for crunch, a sprinkle of cinnamon for warmth, or a dollop of sugar-free whipped cream on top. You can even swirl in some peanut butter or sugar-free caramel for extra decadence.
Q: Does the mug cake stay good if I want to make it ahead?
A: mug cakes are best enjoyed fresh and warm, but you can wrap leftovers tightly and store them in the fridge for up to 2 days. Reheat gently in short bursts to avoid drying it out.
Q: Why should I try this sugar-free recipe instead of traditional chocolate cake?
A: Because indulgence shouldn’t come with a side of guilt! This mug cake lets you enjoy chocolatey goodness in a portion-controlled, health-conscious way, proving that dessert can be both delicious and mindful.
Q: What’s the best mug to use for this recipe?
A: Opt for a microwave-safe mug that holds about 10-12 ounces.Larger mugs give the batter room to rise without spilling over,keeping cleanup mess-free.
Ready to treat yourself without the sugar crash? This easy sugar-free chocolate mug cake is your new best friend for quick, wholesome indulgence!
The way Forward
There you have it-a delightful dessert that satisfies your chocolate cravings without the sugar-induced guilt. This easy sugar-free chocolate mug cake proves that indulgence and mindful eating can go hand in hand. Next time you’re in need of a quick treat, remember that a rich, fudgy mug cake is just minutes away, ready to brighten your day and nourish your sweet tooth-without compromising your healthy habits. So go ahead, indulge guilt-free, and savor every luscious bite!