Choosing the Perfect Plant-Based Ingredients for Irresistible Flavor
Deliciously Simple Vegan Oatmeal Chocolate Chip Cookies Recipe begins with a thoughtful selection of plant-based ingredients that build layers of rich, comforting flavor. Opting for rolled oats over instant oats ensures a delightful chewiness and a rustic texture,while using coconut sugar instead of refined white sugar imparts a subtle caramel undertone that beautifully complements the dark chocolate chips. For the fat component, coconut oil lends a mild tropical note and helps achieve that coveted crisp edge, yet vegan butter can be a fantastic swap for a richer mouthfeel.Additionally, a splash of pure vanilla extract ties the flavors together, adding warmth without overpowering the cookie’s natural sweetness.
To maximize depth and complexity, consider including a pinch of cinnamon or freshly grated nutmeg. These spices evoke cozy autumnal vibes and elevate the cookie beyond the ordinary. Choosing high-quality dairy-free chocolate chips-such as those made from organic cocoa or cacao nibs-will intensify the chocolate burst in every bite. Remember, sustainable and minimally processed ingredients not only enhance taste but nourish your body and the planet.
Mastering the Art of Texture in Vegan oatmeal Chocolate Chip Cookies
The magic of perfect texture lies in balancing chewiness with the slightest crisp on the edges. Using old-fashioned rolled oats ensures each cookie has a pleasant bite,as these oats hold their shape better than quick or instant varieties. Incorporating a flaxseed or chia egg replacement, mixed with water until gelatinous, helps bind the dough while maintaining a tender crumb. Coconut oil’s semi-solid state at room temperature provides structure and a slight crunch, while keeping the centers soft.
Another key tip is to not overbake the cookies. Pull them from the oven just as their edges turn golden but centers remain slightly soft-this guarantees chewy centers after cooling. For an extra layer of texture, lightly toast the oats before mixing; this step imparts a subtle nuttiness that marries beautifully with the chocolate chips.
Tips for Baking the Ultimate Moist and Chewy Vegan Treats
Avoid drying out your cookies by measuring your flour correctly-use a spoon-and-level method rather than scooping directly from the bag. Adding a tablespoon of unsweetened applesauce or mashed banana can boost moisture naturally, keeping your cookies luscious and tender without extra oil. If your dough feels too stiff, a splash of unsweetened plant milk (almond, oat, or soy) helps loosen it without sacrificing flavor.
Remember, chilling the dough for at least 30 minutes before baking is a simple trick that enhances texture and flavor development. It prevents excessive spreading and results in thicker, chewier cookies. choose a parchment-lined baking sheet to avoid sticking and ensure even browning.
Creative Variations to Elevate Your Vegan cookie Experience
Once you’ve mastered the classic, don’t hesitate to experiment. Swapping classic semisweet chocolate chips for chunks of vegan white chocolate,dried cranberries,or chopped pecans can add exciting layers of sweet,tart,or crunchy texture.For a seasonal twist, sprinkle toasted coconut flakes or a few lavender buds on top before baking.
For an indulgent treat, drizzle your baked cookies with melted vegan caramel sauce or a dusting of powdered sugar and sea salt. Incorporating spices like cardamom or ginger adds a sophisticated flair, ideal for afternoon tea or gifting to loved ones.The possibilities are endless, so personalize your Deliciously Simple Vegan Oatmeal Chocolate Chip Cookies recipe to reflect your own culinary creativity.
Prep and Cook Time
- Preparation Time: 15 minutes
- Chilling Time: 30 minutes
- Baking Time: 12-14 minutes
- Total Time: 57 minutes
Yield
Makes approximately 24 cookies, perfect for sharing or an indulgent week of snacking.
Difficulty Level
Easy – perfect for beginner bakers and seasoned pros alike.
Ingredients
- 1 1/2 cups rolled oats (old-fashioned)
- 3/4 cup all-purpose flour,sifted
- 1/2 cup coconut sugar
- 1/4 cup brown sugar,packed
- 1/2 cup melted coconut oil (or vegan butter)
- 1 flax egg: 1 tbsp ground flaxseed + 3 tbsp water,combined and set
- 1 tsp baking soda
- 1/2 tsp sea salt
- 1 tsp pure vanilla extract
- 1 cup vegan dark chocolate chips
- Optional: 1/2 tsp cinnamon or pinch of nutmeg
Instructions
- Preheat your oven to 350°F (175°C). Line two baking sheets with parchment paper.
- Prepare the flax egg: In a small bowl, mix ground flaxseed with water and let it sit for 5 minutes until gelatinous.
- Toast the oats: In a dry skillet over medium heat, toast the rolled oats for 3-4 minutes, stirring frequently until aromatic and lightly golden. Let cool.
- Mix dry ingredients: In a large bowl, combine the flour, baking soda, sea salt, coconut sugar, brown sugar, and optional spices.
- Blend wet ingredients: In another bowl, whisk together the melted coconut oil, vanilla extract, and flax egg until smooth.
- Combine: Pour the wet mixture into the dry ingredients. Stir until just combined, then fold in the toasted oats and chocolate chips.
- Chill the dough: Cover and refrigerate the dough for at least 30 minutes to firm up.
- Form cookies: Using a tablespoon or cookie scoop, drop dough onto the prepared baking sheets, spacing them 2 inches apart.
- Bake: Bake for 12-14 minutes or until edges are golden but centers look slightly soft. Avoid overbaking for chewy cookies.
- Cool: Allow cookies to cool on the baking sheet for 5 minutes before transferring to a wire rack to cool wholly.
Tips for Success
- Substitute rolled oats: For a gluten-free version, use certified gluten-free oats.
- Sweetener swap: Maple syrup or agave can replace sugar but reduce other liquids slightly.
- dough consistency: If too crumbly, add a tablespoon of plant milk gradually to moisten.
- Make-ahead: Dough can be stored in the refrigerator up to 3 days or frozen for 2 months. Bake from chilled or frozen.
- Storage: Keep cookies in an airtight container at room temperature for up to 5 days or freeze for longer.
serving suggestions
Serve these cookies with a chilled glass of almond milk or your favorite hot beverage like chai or espresso for a cozy treat. Garnish with a light dusting of powdered sugar or a sprinkle of flaky sea salt for a gourmet touch. For parties, place the cookies on a rustic wooden platter surrounded by fresh berries and edible flowers, creating a visually stunning dessert centerpiece that’s sure to impress.
| Nutrition per Cookie | Amount |
|---|---|
| Calories | 140 kcal |
| Protein | 2 g |
| Carbohydrates | 22 g |
| Fat | 6 g |

For more plant-based baking inspiration, check out our vegan Desserts Collection. Also, discover expert baking science tips at king Arthur Baking to perfect your craft.
Q&A
Q&A: Deliciously Simple Vegan Oatmeal Chocolate Chip Cookies Recipe
Q1: What makes these oatmeal chocolate chip cookies vegan?
A1: These cookies skip traditional animal-based ingredients like butter, eggs, and dairy. Instead, they use plant-based alternatives such as coconut oil or vegan margarine, flaxseed or chia seeds as egg substitutes, and dairy-free chocolate chips. This keeps the flavor rich and the texture chewy without compromising on compassion.
Q2: How do you achieve the perfect chewy texture without eggs?
A2: The magic lies in using flaxseed or chia seeds mixed with water as an egg replacement. this mixture acts as a natural binder and retains moisture, giving the cookies that perfect chewy bite.Plus, rolled oats add a hearty texture that’s both satisfying and wholesome.
Q3: Can I use gluten-free oats in this recipe?
A3: Absolutely! Just be sure to pick certified gluten-free oats if you have sensitivities or celiac disease. The rest of the recipe works seamlessly with gluten-free oats, making these cookies a treat for everyone to enjoy.
Q4: What’s the best type of vegan chocolate chips to use?
A4: Look for dairy-free and ethically sourced chocolate chips. Dark chocolate chips ofen have a higher cocoa content and less added sugar, which pairs beautifully with the nuttiness of oats. Some brands even offer cacao nibs or vegan white chocolate chips, which can add exciting twists to the classic flavor.
Q5: Is this recipe quick and beginner-kind?
A5: Yes! This recipe was designed with simplicity in mind-minimal ingredients, straightforward steps, and no fancy equipment needed.Whether you’re a novice baker or a seasoned cookie enthusiast, you’ll appreciate how easily these come together for a quick, guilt-free treat.
Q6: Can I customize the cookies with nuts or dried fruit?
A6: Definitely! Feel free to mix in chopped walnuts,pecans,or dried cranberries for added texture and flavor. Just keep the total mix-ins to about a cup to maintain the balance and baking consistency.
Q7: How should I store these cookies to keep them fresh?
A7: Store them in an airtight container at room temperature for up to 4-5 days. For longer storage, pop them in the freezer-frozen cookies can stay fresh for up to 3 months and are deliciously quick to thaw or even enjoy frozen!
Q8: What’s the secret to not overbaking vegan cookies?
A8: Vegan cookies often continue to firm up as they cool, so it’s best to pull them from the oven when the edges are slightly golden but the centers look a bit soft. This ensures a tender, chewy result rather than a dry, crumbly cookie.Q9: Can this recipe be turned into cookie bars?
A9: Yes! Simply press the dough evenly into a lined baking pan and bake a bit longer until golden and set. Once cooled, cut into bars for a convenient grab-and-go snack perfect for lunchboxes or picnics.
Q10: Why choose vegan oatmeal chocolate chip cookies over regular ones?
A10: Beyond dietary preferences, vegan oatmeal chocolate chip cookies frequently enough boast cleaner ingredients with less saturated fat and no cholesterol. They’re kinder to animals and the planet while still delivering that timeless, comforting cookie experience we all crave. Plus, their wholesome ingredients can provide a nutrient boost with the fiber from oats and the antioxidants in dark chocolate!
The Way Forward
Baking these deliciously simple vegan oatmeal chocolate chip cookies is more than just making a sweet treat-it’s a festivity of wholesome ingredients coming together in perfect harmony. with each soft, chewy bite, you’re enjoying a recipe that’s as kind to the planet as it is indeed to your taste buds. Whether you’re a seasoned vegan, a curious foodie, or simply someone craving a comforting cookie, these cookies offer a guilt-free indulgence that’s easy to whip up anytime.So go ahead, grab your mixing bowl and savor the joy of homemade, plant-based goodness-one cookie at a time.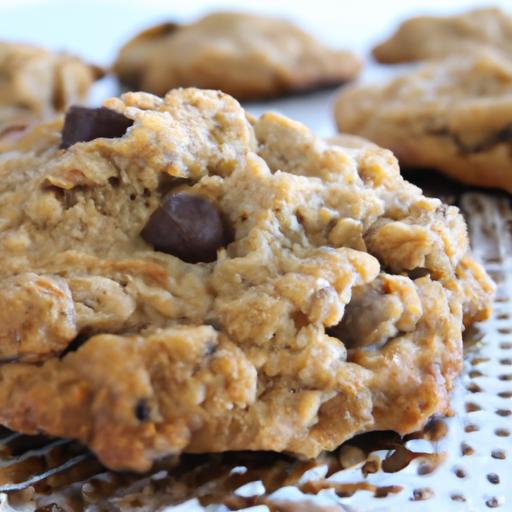
Decadent no-bake chocolate truffles captivate with their luxurious creaminess and velvety texture-without ever heating up your kitchen. born from timeless European traditions and cherished for their simplicity, these treats offer indulgence at its purest.Imagine biting into a luscious bite where rich dark chocolate melts effortlessly, harmonized by subtle hints of vanilla or a playful twist of unexpected spice.This recipe unlocks the secrets to mastering the perfect texture, blending premium ingredients with creative flair to elevate every homemade truffle to unparalleled decadence.
Prep and Cook Time
- Preparation: 20 minutes
- Chilling: 2 hours
- total: Approximately 2 hours 20 minutes
Yield
Makes approximately 24 medium-sized truffles
Difficulty Level
easy – Perfect for beginners and seasoned dessert lovers alike
Ingredients
- 8 oz (225g) high-quality dark chocolate (70% cocoa, finely chopped)
- ½ cup (120ml) heavy cream
- 3 tbsp unsalted butter, softened and cubed
- 1 tsp pure vanilla extract
- ¼ tsp fine sea salt
- For rolling/coating:
- Cocoa powder, sifted
- Finely crushed toasted nuts (e.g., pistachios, hazelnuts)
- Edible gold flakes or sea salt flakes (optional for garnish)
Instructions
- Warm the heavy cream gently: In a small saucepan, heat the cream over low heat just until it begins to simmer. Avoid boiling as overheating changes the texture of your ganache.
- Combine cream and chocolate: Place the chopped dark chocolate in a heatproof bowl. Pour the hot cream over the chocolate and let it sit for 2 minutes to soften the pieces.
- Stir into a silky ganache: Using a spatula or whisk, gently stir the mixture until smooth and glossy. Add the softened butter, vanilla extract, and sea salt, stirring continuously until fully incorporated.
- Chill for firmness: Cover the bowl with plastic wrap and refrigerate for about 1.5 to 2 hours, or until the ganache is firm enough to shape but still pliable.
- portion and roll: Using a melon baller or teaspoon,scoop the ganache and quickly roll into smooth balls using your palms. Work swiftly to prevent melting.
- Coat creatively: Roll each truffle in your choice of cocoa powder, crushed nuts, or other coatings. For a touch of elegance, sprinkle with edible gold flakes or a pinch of sea salt.
- Final chill: Place the coated truffles on a parchment-lined tray and refrigerate for an additional 30 minutes to set completely before serving.
Tips for Success
- Chocolate quality matters: Use premium dark chocolate with at least 70% cocoa content for the richest flavor and smoothest texture.
- Room temperature butter: Softened butter lends extra silkiness and helps the ganache set with a creamy finish.
- Keep your hands cool: Rolling truffles can warm the ganache-chill your hands periodically or use gloves for easier shaping.
- Experiment with flavors: Add a splash of coffee liqueur, orange zest, or a pinch of chili powder to the ganache for exciting variations.
- Make ahead advantage: Truffles can be stored in an airtight container in the refrigerator for up to 1 week or frozen for up to 1 month.
Serving Suggestions
Present these decadent delights on a sleek slate platter or in petite paper cups to highlight their elegant form. Garnish with fresh mint leaves for a pop of color or sprinkle finely chopped candied ginger for a zesty surprise. Pair with a robust espresso or a glass of vintage port to fully embrace the luxurious experience. These chocolate truffles also make exquisite gifts-wrap them in cellophane tied with a ribbon for a personal touch.
| Nutrient | amount per Truffle |
|---|---|
| Calories | 90 kcal |
| protein | 1 g |
| Carbohydrates | 7 g |
| Fat | 7 g |

For more inspiration, explore our collection of rich chocolate desserts, or learn about professional chocolate tempering techniques to further transform your chocolate expertise.
Q&A
Q&A: Decadent No-Bake Chocolate Truffles – Simple & Irresistible
Q1: What makes these no-bake chocolate truffles so decadent?
A1: The decadence comes from the rich, velvety chocolate combined with a luscious, creamy filling that melts in your mouth. Using high-quality cocoa or dark chocolate adds deep,complex flavors,while the absence of baking preserves their silky texture and indulgent charm.
Q2: How simple are these chocolate truffles to make?
A2: Surprisingly simple! With just a handful of ingredients-usually chocolate, cream, butter, and a touch of flavoring-you mix, chill, and shape. No need for ovens or intricate techniques. Even beginners can whip up these divine bites in under 30 minutes.Q3: Can I customize these truffles to suit my taste?
A3: Absolutely! The beauty of no-bake truffles lies in their versatility. Add espresso powder for a mocha twist, a splash of liqueur for grown-up glamour, or roll them in crushed nuts, cocoa powder, or sprinkles for texture and flair. Your taste buds are the limit.
Q4: What’s the secret to perfectly smooth and glossy truffle filling?
A4: Patience and technique. Gently melting the chocolate with warm cream to create a ganache, then chilling it thoroughly before shaping, ensures a silky consistency. Avoid overheating the chocolate-gentle heat is key to that glossy finish and melt-in-your-mouth softness.Q5: How should I store these truffles to keep them fresh and delicious?
A5: Store them in an airtight container in the refrigerator if you want them firm or at cool room temperature for a softer bite. they typically stay fresh for up to two weeks. For longer storage, freeze them wrapped well, thawing slowly before serving.
Q6: Are these truffles suitable for special occasions or gifts?
A6: Definitely! Their elegant appearance and rich flavor make them a perfect treat for celebrations or heartfelt gifts. Package them in pretty boxes or decorative tins, and you’ve got a luxurious homemade delight that’s sure to impress.
Q7: Can these no-bake chocolate truffles fit into a vegan or dairy-free diet?
A7: With a few smart substitutions, yes! Use coconut cream or plant-based cream alternatives, paired with high-quality dairy-free dark chocolate. The result is an equally creamy, indulgent truffle that’s kind to both your palate and dietary preferences.
Indulge your senses without the fuss – these decadent no-bake chocolate truffles prove that simplicity and luxury truly can go hand in hand.Ready to start rolling?
wrapping Up
As the rich, velvety allure of these no-bake chocolate truffles melts effortlessly on your tongue, it’s clear that indulgence doesn’t have to be complicated. With just a handful of simple ingredients and no oven required, you’ve discovered a timeless recipe that transforms everyday moments into decadent celebrations. Whether gifting them to loved ones or savoring a quiet treat solo, these truffles embody the perfect balance of simplicity and sophistication. So go ahead-embrace the art of effortless luxury and let each bite remind you that sometimes,the sweetest pleasures are the simplest to create.
Deliciously Simple Vegan Oatmeal Chocolate Chip cookies capture the perfect marriage of chewy texture and rich, comforting flavor. these cookies are a delightful plant-based twist on a timeless classic, inspired by countless afternoons spent baking in my grandma’s cozy kitchen. Using wholesome, thoughtfully chosen ingredients ensures every bite is nourishing and also decadent. Whether you’re a seasoned vegan baker or just curious about plant-based treats,this recipe unlocks the secrets to creating golden-hued,mouthwatering cookies that stay soft and chewy,with the satisfying bite of hearty oats and luscious chocolate chips melting throughout.
Prep and Cook Time
- Preparation: 15 minutes
- Chilling (optional but recommended): 30 minutes
- Baking: 12-14 minutes
- Total: Approximately 45 minutes
yield
24 deliciously chewy cookies, perfect for sharing or savoring slowly with your favorite warm drink.
Difficulty Level
Easy: Suitable for bakers of all experience levels.
Ingredients
- 1 cup rolled oats (old-fashioned)
- 1 cup all-purpose flour, sifted
- 1/2 teaspoon baking soda
- 1/4 teaspoon sea salt
- 1/2 cup coconut oil, melted (or vegan butter)
- 1/2 cup coconut sugar or brown sugar, packed
- 1/4 cup unsweetened applesauce
- 1/3 cup almond milk or any plant-based milk
- 1 teaspoon pure vanilla extract
- 3/4 cup vegan chocolate chips (dark chocolate recommended)
- Optional: 1/4 cup chopped walnuts or pecans for added crunch
Instructions
- Preheat your oven to 350°F (175°C) and line a baking sheet with parchment paper or a silicone mat for easy cleanup.
- In a medium bowl, whisk together the rolled oats, sifted flour, baking soda, and sea salt until fully combined. This dry mixture is the foundation for that chewy bite.
- In a separate large bowl, mix the melted coconut oil, coconut or brown sugar, and applesauce. whisk vigorously until smooth and creamy-this ensures a tender crumb.
- Stir in the almond milk and vanilla extract into the wet ingredients gradually; this boosts moisture and depth of flavor without weighing down the dough.
- Slowly add the dry ingredients to the wet mixture, folding gently with a spatula until just combined. Overmixing can lead to tough cookies, so stop when you see no streaks of flour.
- Fold in the vegan chocolate chips and optional nuts, distributing them evenly for pockets of rich chocolate and delightful crunch.
- Optional step: Chill the dough in the fridge for 30 minutes. This solidifies the fat and helps cookies hold their shape while baking,yielding a chewier texture.
- Using a cookie scoop or spoon, drop generous dollops of dough 2 inches apart on the prepared baking sheet. Flatten slightly with your fingers or the back of a spoon to promote even baking.
- Bake for 12-14 minutes, or until edges turn golden brown but centers remain soft. Avoid overbaking; residual heat will finish the cooking once removed.
- Cool the cookies on the baking sheet for 5 minutes before transferring to a wire rack. This resting phase is key for them to set perfectly chewy without crumbling.
Tips for Success with Your Deliciously Simple Vegan Oatmeal Chocolate Chip Cookies
- Ingredient swaps: Feel free to replace all-purpose flour with a gluten-free blend if preferred; just increase binding agents slightly, like flax or chia eggs, if needed.
- Sweetener choice: Coconut sugar enhances a mild caramel note, but organic maple syrup or agave can also add complex layers of sweetness; reduce wet liquids accordingly.
- Texture magic: Incorporate old-fashioned oats, not instant, for that hearty, chewy bite that defines great oatmeal cookies.
- Make-ahead: The dough freezes beautifully; scoop into balls and store frozen for up to 3 months-bake straight from freezer, adding a minute or two to baking time.
- Chocolate chips tip: Opt for high-quality vegan dark chocolate to avoid overly sweet or waxy bites-chunks also work wonderfully for melty, rustic pockets of chocolate.
Serving Suggestions
These cookies shine as a standalone snack with a steaming cup of almond or oat milk.For elegant presentation, serve on a rustic wooden board garnished with fresh mint leaves and a light dusting of powdered sugar. They’re perfect paired with a scoop of vegan vanilla ice cream or drizzled with homemade cashew caramel for dessert. The hearty texture also lends itself well to cookie sandwiches filled with nut butters or fruit preserves.

Nutritional Information
| Nutrient | per cookie (approx.) |
|---|---|
| Calories | 120 kcal |
| Protein | 2 g |
| Carbohydrates | 18 g |
| Fat | 5 g |
| Fiber | 2 g |
Looking for more vegan treats that are equally simple and rewarding? Check out our Vegan Banana Bread recipe for another wholesome delight. for further reading on the benefits and best practices of plant-based ingredients, visit the informative guide on Healthline’s Vegan Diet Benefits.
Q&A
Q&A: Deliciously simple Vegan Oatmeal Chocolate Chip Cookies
Q1: What makes these oatmeal chocolate chip cookies “deliciously simple”?
A1: These cookies strike the perfect balance between easy preparation and mouthwatering flavor.With just a handful of wholesome, plant-based ingredients-like rolled oats, dairy-free chocolate chips, and natural sweeteners-you can whip up a batch in no time, no oven mastery required. Simplicity here means less fuss, more yum!
Q2: are these cookies truly vegan?
A2: absolutely! Every ingredient in this recipe is 100% plant-based. No eggs, no butter, no dairy-just pure, plant-powered goodness. Using flaxseed or chia seeds as an egg substitute and coconut oil or vegan butter keeps the cookies tender and chewy without compromising on taste.
Q3: Can I customize these cookies to suit my preferences?
A3: Definitely! These cookies are like a blank canvas for your creativity. Swap in your favorite nuts or dried fruits, try different types of vegan chocolate chips (dark, semi-sweet, or even white vegan chocolate), or sprinkle in some cinnamon or nutmeg for a cozy twist. The base recipe is forgiving and versatile.
Q4: How do these cookies compare texture-wise to traditional oatmeal chocolate chip cookies?
A4: These vegan gems achieve a delightful balance of chewy and soft, thanks to the oats and the binding power of flaxseed or chia. They might be a bit more tender than classic recipes with eggs, but the rich chocolate chips melt luxuriously, creating pockets of gooey goodness in every bite.
Q5: What’s the best way to store these cookies?
A5: to keep them fresh and chewy, store your cookies in an airtight container at room temperature for up to five days. For longer shelf life, pop them into the freezer; they thaw quickly and taste freshly baked every time. For an extra treat, warm them for a few seconds before enjoying!
Q6: Are these cookies healthy, or just indulgent?
A6: These cookies walk the line between indulgence and nutrition.Made with rolled oats, they offer fiber and slow-burning energy, while using natural sweeteners avoids refined sugars.Though they’re a treat, they’re a smarter choice than many conventional cookies, making them perfect for guilt-free snacking.
Q7: Can kids enjoy making and eating these vegan oatmeal chocolate chip cookies?
A7: Yes! This recipe is a fantastic way to get little hands involved in the kitchen. Measuring,mixing,and scooping are perfect tasks for kids,and the fun of tasting melting chocolate chips makes it a hit. Plus, it’s a great introduction to vegan baking basics in a wildly delicious form.
Ready to bake a batch? These deliciously simple vegan oatmeal chocolate chip cookies might just become your new go-to comfort treat!
In Conclusion
these deliciously simple vegan oatmeal chocolate chip cookies prove that indulgence and wholesome ingredients can beautifully coexist. Whether you’re a seasoned vegan or just exploring plant-based treats, this recipe offers a perfect balance of chewy oats, rich chocolate, and just the right touch of sweetness-all without any animal products. So next time you crave a comforting cookie, remember that a batch of these easy, tasty delights is just an oven away, ready to satisfy your sweet tooth and nourish your body.Baking vegan has never been this inviting-or this delicious.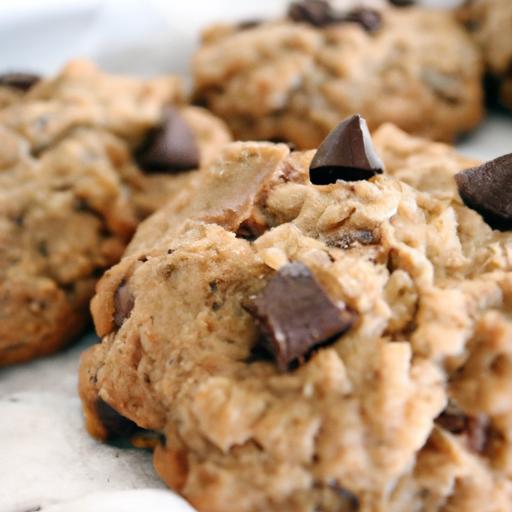
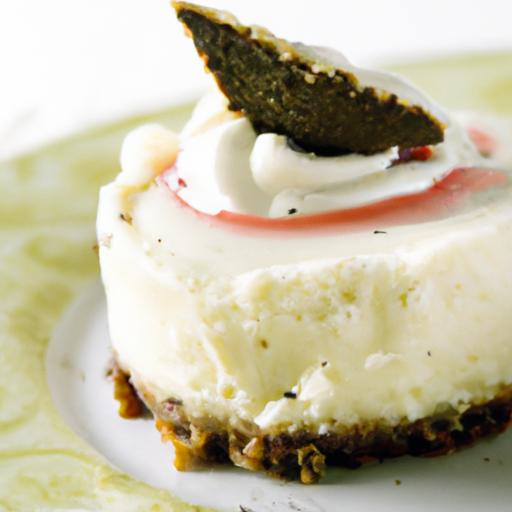
Decadent No Bake Oreo Cheesecake is a delightful treat that combines the intense crunch of crushed Oreo cookies with a lush, velvety cream cheese filling-no oven required. This luscious dessert evokes memories of nostalgic indulgence, perfect for those moments when you crave a rich, creamy cheesecake without the fuss of baking. Originating from the classic American cheesecake tradition,this no-bake version elevates the iconic Oreo cookie into an irresistible centerpiece,making it a favorite for gatherings and celebrations alike.
Prep and Cook Time
Planning: 20 minutes | Chilling: 4 hours (or overnight for best results)
Yield
Serves: 8 generous slices
Difficulty Level
Easy – Perfect for beginners and busy cooks looking for an impressive, no-fuss dessert.
Key Ingredients and Their Perfect Ratios
- 24 Oreo cookies (divided: 18 crushed for crust and filling,6 for garnish)
- 1/2 cup (115g) unsalted butter,melted – binds the crust to the ideal texture
- 16 oz (450g) cream cheese,softened – ensures a smooth creamy base
- 1 cup (240ml) heavy whipping cream – whipped to soft peaks for lightness
- 3/4 cup (90g) powdered sugar – sweetens the cheesecake without graininess
- 1 tsp pure vanilla extract – adds depth and aromatic warmth
Step by Step Guide to a Smooth and Creamy Texture
- Prepare the crust: Finely crush 18 Oreo cookies using a food processor or by placing them in a sealed bag and crushing with a rolling pin. Combine the crushed Oreos with the melted butter until mixture resembles wet sand.
- Press the crust: Firmly press this mixture into the bottom of a 9-inch springform pan, creating an even base. Chill in the refrigerator while preparing the filling to set the crust.
- Whip the cream: In a chilled bowl, beat the heavy whipping cream with a hand mixer until soft peaks form. Set aside.
- Create the cream cheese base: In a seperate bowl, beat the softened cream cheese with powdered sugar and vanilla extract on medium speed until smooth and fluffy.
- Fold in whipped cream: Gently fold the whipped cream into the cream cheese mixture using a rubber spatula, taking care to maintain the airy texture.
- Incorporate Oreo pieces: Stir in 1 cup of coarsely chopped Oreos, giving perfect bursts of crunch throughout the creamy filling.
- Assemble the cheesecake: Pour the filling over the chilled crust in the springform pan and smooth the top evenly.
- Chill thoroughly: Refrigerate for at least 4 hours or overnight to allow the cheesecake to firm into a sliceable perfection.
Tips for Stunning Presentation and Serving Suggestions
- Before serving, garnish the top with the reserved whole Oreo cookies, halved or twisted into cream-filled halves, for an artistic touch.
- Lightly dust with cocoa powder or sprinkle edible gold dust to elevate the elegant look.
- Serve with fresh berries-such as raspberries or strawberries-to add tartness that balances the rich sweetness.
- A drizzle of warm chocolate or caramel sauce on each slice enhances both taste and visual appeal.
- For added texture, sprinkle finely chopped toasted nuts like pecans or almonds around the edges just before serving.
Chef’s Notes: Tips for Success
- Use room temperature cream cheese to avoid lumps and achieve a smoother filling.
- for a firmer cheesecake, increase chilling time to overnight and consider using a water bath during refrigeration to prevent cracks in other recipes.
- If you prefer a lighter crust, substitute half the Oreos with crushed graham crackers.
- To make it gluten-free, swap Oreos with certified gluten-free chocolate sandwich cookies.
- Make-ahead tip: This cheesecake keeps beautifully in the fridge for up to 3 days or can be frozen for up to 1 month-wrap tightly to avoid freezer burn.
- When folding whipped cream into cream cheese, use gentle strokes to maintain volume and avoid deflating the mixture.
| Nutritional Info (per slice) | calories | Protein | carbs | Fat |
|---|---|---|---|---|
| Decadent No Burn Oreo Cheesecake | 420 kcal | 6 g | 35 g | 30 g |
For more dreamy no-bake desserts,check out our Easy No-Bake Desserts Collection. Discover the science behind perfect creaminess on Serious Eats.

Q&A
Q&A: Decadent No-Bake Oreo Cheesecake – Simple & Irresistible Delight
Q1: what makes this oreo cheesecake “decadent” even though it’s no-bake?
A1: The richness comes from the luscious cream cheese filling combined with crushed oreo cookies, creating layers of creamy, chocolaty delight without the need for an oven. The no-bake method preserves the silky texture, giving you an indulgent dessert that’s both smooth and packed with bold flavor.
Q2: Is this cheesecake difficult to prepare?
A2: Not at all! This recipe is designed for simplicity-no baking,no complicated techniques. Just mix, chill, and garnish. It’s perfect for beginners or anyone looking for a speedy, fail-proof dessert that impresses every time.
Q3: How long does it take to set?
A3: While the prep only takes about 15-20 minutes,the cheesecake ideally needs 4 hours in the refrigerator to set firmly. Overnight chilling works even better, allowing those flavors to meld into a perfect harmony of texture and taste.
Q4: Can I customize this recipe?
A4: Absolutely! You can sprinkle extra oreo crumbs on top,drizzle with chocolate or caramel sauce,or even add a dollop of whipped cream. For a twist, try mixing in crushed nuts, a hint of espresso powder, or a splash of vanilla extract.
Q5: What kind of Oreo cookies should I use?
A5: Classic Oreos work wonderfully here, but feel free to experiment with flavored varieties like Double Stuf, Golden Oreos, or even limited-edition seasonal flavors to give your cheesecake a unique flair.
Q6: Is this dessert suitable for special occasions?
A6: Definitely! Its elegant layers and irresistible taste make it a showstopper for birthdays, holidays, or casual gatherings. Plus, since it requires no oven time, you can whip it up last minute and still dazzle your guests.Q7: How should I store leftover cheesecake?
A7: Keep any leftovers covered in the refrigerator for up to 3-4 days. The flavors will remain just as decadent, and the texture stays creamy and fresh.
Q8: Can this recipe be made dairy-free or vegan?
A8: With some substitutions, yes! Use plant-based cream cheese and whipped topping alternatives, and opt for vegan Oreo cookies. The no-bake format lends itself well to creative dietary tweaks without sacrificing that creamy,dreamy factor.
Indulge in this no-bake Oreo cheesecake-a dessert that’s as simple to make as it is indeed unachievable to resist!
Insights and Conclusions
In the world of desserts, sometiems the simplest recipes lead to the most unforgettable moments. This decadent no-bake Oreo cheesecake proves that indulgence doesn’t require hours in the kitchen-just a few quality ingredients and a little patience. Whether you’re serving it at a casual gathering or saving a slice for a quiet evening, its rich, creamy texture and classic cookie crunch deliver a timeless treat that’s both effortless and unusual. So next time you crave a dessert that’s as simple to make as it is impossible to resist, remember this delightfully easy Oreo cheesecake-proof that sometimes, the best things in life really are no-bake.
Tomato toast Uncovered: A Simple Twist on Classic Flavor
Tomato toast uncovered reveals a humble yet extraordinary way to elevate fresh, seasonal ingredients into a vibrant meal. Rooted in Mediterranean simplicity, this dish has evolved from rustic farmers’ breakfasts to gourmet café menus worldwide. The harmonious marriage of juicy tomatoes and crunchy bread touches on nostalgia while inviting creative flair, making it the perfect canvas for culinary explorers. Whether you’re seeking a refreshing breakfast or a light, satisfying snack, this recipe embraces freshness with a delightful twist.
Prep and Cook Time
- Preparation: 10 minutes
- cooking: 5 minutes
- Total Time: 15 minutes
Yield
Serves 2
Difficulty Level
Easy
Ingredients
- 4 slices crusty sourdough bread (about ½ inch thick)
- 2 medium</b heirloom tomatoes, ripe and juicy, sliced thinly
- 2 tbsp extra virgin olive oil, plus extra for drizzling
- 1 garlic clove, peeled and halved
- 1 tbsp fresh basil leaves, finely chopped
- 1 tsp flaky sea salt
- ½ tsp freshly ground black pepper
- Optional: pinch of red pepper flakes for gentle heat
- 1 tbsp fresh lemon juice
- 1 tbsp crumbled feta or ricotta salata (optional)
Instructions
- toast the bread: Lightly toast the sourdough bread slices until golden and crisp but still slightly tender inside, enhancing texture contrast.
- Prepare the tomatoes: While the bread toasts, slice your heirloom tomatoes thinly to showcase their vibrant colors and juicy texture. In a bowl,toss the slices gently with olive oil,lemon juice,basil,salt,and pepper. This will marinate the tomatoes, unlocking their full flavor.
- Rub the toast with garlic: Immediately after toasting, rub each slice with the cut side of the garlic clove, infusing the bread with subtle pungency and depth.
- Assemble your toast: Generously layer the marinated tomato slices atop each toast. Let the juices soak slightly into the bread for a luscious bite.
- Add finishing touches: Drizzle a little more extra virgin olive oil over the top, sprinkle some red pepper flakes if desired, and finish with crumbled feta or ricotta salata for a creamy contrast.
- Serve immediately: For the freshest experience, serve right away to enjoy the crispness of the toast alongside juicy bursts of tomato.
Chef’s Notes: Tips for Success
- Choosing bread: Select a hearty, artisan sourdough for its chewy crumb and tangy flavor. Whole grain or rustic country bread also work beautifully.
- Tomato tips: Opt for heirloom or vine-ripened tomatoes that are firm yet yielding to the touch-this ensures natural sweetness and vivid color.
- Extra flavor layers: For an exciting twist, try adding a thin smear of ricotta or a drizzle of aged balsamic vinegar before topping with tomatoes.
- Make ahead: Prepare the marinated tomato mix up to 1 hour in advance for deeper flavor but slice and toast your bread just before serving to retain crunch.
- Vegan option: omit cheese and add avocado slices or a sprinkle of toasted pine nuts for richness.
Serving Suggestions
This dish shines when served with a chilled glass of crisp white wine or a refreshing iced herbal tea. Garnish your tomato toast with fresh microgreens or edible flowers for an elegant finish. Pair with a light green salad or a bowl of chilled gazpacho to create a balanced Mediterranean-inspired meal perfect for warm days.
| Nutrient | Per Serving |
|---|---|
| Calories | 230 kcal |
| Protein | 5 g |
| Carbohydrates | 24 g |
| Fat | 12 g |
Exploring the origins and Evolution of Tomato Toast Uncovered
Tracing back to rustic Italian and Spanish kitchens, this concept began as a rapid way to enjoy fresh garden tomatoes atop freshly baked bread, epitomizing the essence of “cucina povera” – simple food done right. Over the years, chefs worldwide have reinvented tomato toast uncovered by experimenting with various herbs, breads, and toppings, highlighting its versatility. Today, it bridges traditional and contemporary palates, bringing together artful presentation and heartfelt comfort.
Choosing the Perfect Bread and Tomatoes for Ultimate Freshness
The foundation of this dish lies in selecting the right bread and tomatoes. A rustic sourdough or country loaf offers a firm, tangy base that crisps without crumbling, creating a perfect cradle for your tomato medley. When it comes to tomatoes, heirlooms with multilayered flavors and vibrant hues deliver unmatched freshness and visual appeal. Always pick tomatoes that are firm with a slight give-overly soft or mealy tomatoes dilute the dish’s character.
Crafting the Ideal Balance of Flavors with Herbs and Seasonings
Tomato toast uncovered thrives on the delicate layering of tastes. Fresh herbs like basil, oregano, or tarragon add aromatic brightness, while sea salt amplifies natural sweetness. Pepper adds subtle heat, and lemon juice introduces brightness and acidity that cut through richness. The olive oil’s fruity notes tie the elements together, making each bite harmonious and lively.
Creative variations to Elevate Your Tomato Toast Experience
Embrace innovation by infusing your tomato toast with global influences.As a notable example, a Middle Eastern twist with za’atar and labneh offers creamy tang; a Mexican spin with avocado, chili flakes, and cilantro adds warmth and zest. Throw in toppings like burrata, smoked salmon, or toasted nuts to add textures and depth.These variations transform a simple toast into an adventurous feast without complicating preparation.
Discover more Mediterranean bruschetta variations for inspiration. For further reading on tomato varieties and their benefits, visit USA Horticulture association.

Q&A
Q&A: Tomato Toast Uncovered: A Simple Twist on Classic Flavor
Q1: What exactly is tomato toast, and why is it gaining so much popularity?
A1: Tomato toast is a humble yet flavorful dish that takes the classic combination of bread and tomato to a whole new level. it’s essentially toasted bread topped with fresh, ripe tomatoes-but what sets it apart is the creative ways home cooks and chefs are layering flavors: drizzles of olive oil, fresh herbs, a sprinkle of sea salt, sometimes even a touch of garlic or cheese.Its rising popularity comes from its simplicity, versatility, and the way it celebrates fresh ingredients in a quick, satisfying bite.
Q2: How did tomato toast become a modern breakfast or snack staple?
A2: The modern tomato toast owes its revival to the farm-to-table movement and the brunch culture craze. People started craving meals that feel fresh and wholesome yet are easy to prepare. Tomato toast hits that sweet spot-it’s nostalgic but elevated, comforting but fresh. Plus, social media foodies loved sharing their colorful, vibrant versions, turning it into a trendy yet accessible dish.Q3: What makes tomato toast more than just “bread and tomato”?
A3: The magic lies in the details. The bread matters-think rustic sourdough or crusty ciabatta, toasted to golden perfection. The tomatoes should be juicy, ripe, and bursting with flavor, whether it’s heirloom, cherry, or plum varieties. Then comes the seasoning: a drizzle of extra virgin olive oil, a pinch of flaky sea salt, cracked black pepper, and fresh herbs like basil or oregano transform the simple base into an explosion of tastes.Some even add a hint of garlic rubbed on the toast or a sprinkle of tangy feta or creamy burrata to add layers of complexity.Q4: Can tomato toast be adapted for different meals or dietary preferences?
A4: Absolutely! Tomato toast is incredibly versatile. For a vegan version, keep it simple with olive oil and herbs or add avocado slices. To boost protein, pair it with a poached egg or a smear of ricotta.those avoiding gluten can use gluten-free bread or crispy vegetable ”toasts” such as roasted eggplant slices. It can serve as breakfast, a midday snack, or even an elegant appetizer when topped with gourmet ingredients like smoked salmon or balsamic glaze.
Q5: What are some creative twists on classic tomato toast that people should try?
A5: The possibilities are endless! Try roasting your tomatoes with garlic and herbs before layering them on toast for a caramelized depth of flavor. Spread a base of whipped goat cheese or hummus for creaminess. Add a sprinkle of chili flakes for heat, or drizzle honey for a sweet contrast. Another trend is the “Mediterranean Tomato Toast,” crowned with olives,capers,and fresh mint. You can even experiment with global influences-like adding za’atar or dukkah spice blends-to give your tomato toast an unexpected zing.
Q6: Why is tomato toast considered a “simple twist on classic flavor“?
A6: Because it honors the beloved, straightforward pairing of bread and tomato but reimagines it with attention and flair. It’s simple in concept but elevated through quality ingredients and creative layering. This dish proves that sometimes the most satisfying flavors come from minimalism combined with a thoughtful twist-bringing out the best in what you probably already have in your kitchen.
Q7: any tips for perfecting your tomato toast at home?
A7: Definitely! Start with fresh, ripe tomatoes; season them well and let them sit briefly to draw out the juices. Toast your bread until it’s golden and crisp but still tender inside. Don’t be shy with good quality olive oil-it’s the flavor foundation for this dish. Finish with a pinch of flaky salt and fresh herbs to brighten it up. And most importantly, experiment! Tomato toast is so forgiving, so make it your own culinary canvas.
The Conclusion
As we’ve peeled back the layers of tomato toast, it’s clear this humble dish is more than just a quick bite-it’s a vibrant celebration of flavor and simplicity. Whether you’re a seasoned foodie or a casual cook, this twist on a classic invites you to explore fresh ingredients in new, inspiring ways. So next time you reach for the bread and tomatoes, remember: sometimes, the most delightful culinary adventures start with the simplest of twists. Here’s to elevating everyday meals, one slice at a time.