Innovative Recipes to Elevate Everyday meals with Avocados From Mexico
How Avocados From Mexico cure your bowl of boredom by infusing vibrant nutrition and creamy indulgence into every bite.This timeless superfruit, celebrated for its buttery texture and subtle, nutty flavor, has a rich heritage tracing back to ancient Mesoamerican cultures, where it was revered as a symbol of fertility and health. What makes this recipe truly exceptional is its fusion of fresh, wholesome ingredients with the smooth richness of ripe Avocados From Mexico, designed to enliven your typical snack or meal and transform it into an immersive culinary experience.
Prep and Cook Time
- Planning: 15 minutes
- Cooking: 10 minutes
- Total Time: 25 minutes
Yield
Serves 4 as a refreshing snack or light meal.
Difficulty Level
Easy – perfect for any skill level eager to experiment with bold flavors and textures.
Ingredients
- 2 ripe Avocados From Mexico, peeled, pitted, and diced
- 1 cup cooked quinoa, cooled to room temperature
- 1/2 cup cherry tomatoes, halved
- 1/4 cup finely diced red onion
- 1/4 cup fresh cilantro, chopped
- 1 small jalapeño, seeded and minced (optional for heat)
- Juice of 1 lime
- 2 tablespoons extra-virgin olive oil
- Salt and freshly ground black pepper, to taste
- 1/4 cup toasted pepitas (pumpkin seeds) for crunch
Instructions
- Prepare the quinoa: If you haven’t pre-cooked quinoa, rinse 1/2 cup dry quinoa under cold water and cook according to package instructions. Set aside to cool.
- Mix the fresh ingredients: In a large bowl, combine the diced Avocados From Mexico, cherry tomatoes, red onion, cilantro, and jalapeño. The creamy avocado melds perfectly with the crisp tomatoes and spicy jalapeño,creating a harmonious texture.
- Dress the salad: Drizzle lime juice and extra-virgin olive oil over the mixture. Add salt and pepper incrementally,tossing gently to coat evenly without mashing your avocado.
- Fold in the quinoa: Add the cooled quinoa to the bowl, folding carefully to preserve the integrity of each ingredient. This step adds body and a nutty dimension to your bowl.
- Finish with pepitas: Just before serving, sprinkle toasted pepitas on top to inject a satisfying crunch, balancing the creamy avocado and fluffy quinoa.
Chef’s Notes
- Use ripe but firm Avocados From Mexico to avoid browning and maintain that buttery mouthfeel. Gently squeeze before dicing-if the fruit yields slightly, it’s perfect.
- For a smoky undertone, toss the pepitas in smoked paprika before toasting.
- Swap quinoa for farro or brown rice for a different grain texture.
- Make-ahead tip: prepare the quinoa and chop ingredients in advance. Combine just before serving to keep the avocado fresh.
- To prevent avocado from browning if made ahead, add a thin layer of lime juice on top and cover tightly with plastic wrap pressed directly onto the mixture.
Creative Serving Suggestions to Turn Routine Bowls into culinary Adventures
Serve this vibrant salad over a bed of crisp mixed greens or alongside grilled chicken or fish for an enhanced meal. For a fusion twist,spoon it into warm corn tortillas and top with crumbled queso fresco and sliced radishes. Alternatively, use it as a filling for savory crepes or atop crunchy toast with a sprinkle of chili flakes. The creamy, nutritious presence of Avocados From Mexico elevates every bite–turning your snack time into an inspired, healthy indulgence.
| Nutrient | Per Serving |
|---|---|
| Calories | 320 kcal |
| Protein | 8 g |
| Carbohydrates | 28 g |
| Fat | 18 g (mostly healthy fats) |

For more creative ways to incorporate avocados, explore our Avocado breakfast Boost Recipes and learn how to store your avocados perfectly by visiting the official Avocados From Mexico storage guide.
Q&A
Q&A: How Avocados From Mexico Cure your Bowl of Boredom
Q1: What does it mean to say avocados can “cure your bowl of boredom”?
A1: Think of your everyday meals as blank canvases-sometimes dull,frequently enough predictable. Avocados from mexico add that splash of creamy, dreamy green goodness that transforms your plain bowls from “meh” to memorable. They inject excitement and flavor, turning boredom into a feast for your senses.
Q2: Why specifically Avocados from Mexico? Aren’t all avocados the same?
A2: Oh no! While avocados come from many places, Avocados from mexico are celebrated for their creamy texture, rich nutrients, and perfect ripeness. Grown under ideal conditions with expert care, they deliver consistently delicious experiences that elevate any bowl-be it a salad, a smoothie, grain bowl, or toast.
Q3: How do avocados enhance the taste and experience of a bowl-based meal?
A3: avocados introduce a buttery mouthfeel and subtle nutty flavor that complement fresh veggies, crunchy grains, and vibrant spices. Their creamy texture contrasts beautifully with crisp ingredients, creating layers of taste and texture that keep your palate intrigued-goodbye boredom, hello flavor adventure!
Q4: Are avocados healthy enough to justify their “boredom-busting” reputation?
A4: Absolutely! avocados are packed with heart-healthy monounsaturated fats, fiber, potassium, and a host of vitamins. They not only satisfy your taste buds but also nourish your body, making your bowl not just engaging, but nutritious and fulfilling.
Q5: Can you give an example of a boredom-busting bowl with Avocados from Mexico?
A5: Imagine a vibrant quinoa bowl: fluffy quinoa, roasted sweet potato, black beans, fresh corn, a sprinkle of feta, and slices of ripe Avocados from Mexico drizzled with zesty lime juice and a pinch of chili flakes. Each bite bursts with flavor and texture-your taste buds awakened and your bowl far from boring!
Q6: What’s the easiest way to incorporate Avocados from Mexico into everyday meals?
A6: Slice ’em, mash ’em, or dice ’em into your dishes. Toss avocado cubes into salads, spread guac on toast, blend them into creamy dressings or smoothies, or just top your breakfast bowl. They’re versatile, fuss-free, and instantly make your meal more exciting.
Q7: Any fun tips to keep avocados fresh and ready for those boredom-curing moments?
A7: To slow browning, sprinkle a little lemon or lime juice on cut avocado. Store avocado halves tightly wrapped in plastic in the fridge, or keep the pit in the unused half. And remember: perfectly ripe avocados feel slightly soft but not mushy-a simple squeeze test is your secret weapon!
With Avocados from Mexico, even the simplest bowl becomes a bold statement. Embrace the green, creamy cure to cure your culinary monotony-your taste buds will thank you!
Closing Remarks
So next time your snack time feels as dull as a rainy Monday, remember that Avocados From Mexico are hear to rescue your bowl-and your taste buds-from the clutches of boredom.Their creamy texture and vibrant flavor don’t just elevate your meals; they transform them into mini adventures bursting with color, nutrition, and zest. Whether mashed, sliced, or dolloped, these green gems bring a refreshing twist that turns ordinary bites into extraordinary moments. Embrace the avocado, and say goodbye to humdrum eating-because your bowl deserves a little excitement, one luscious scoop at a time.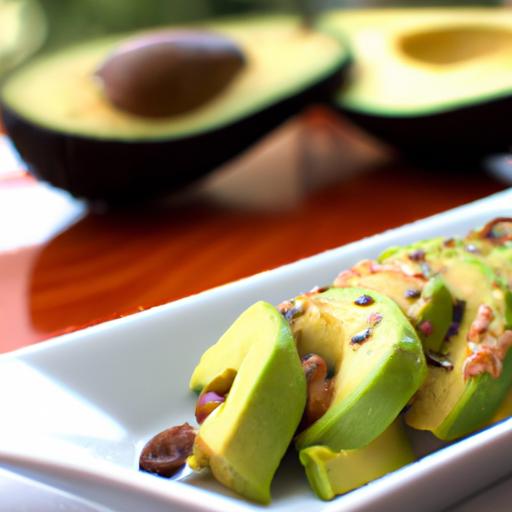
Keto Bulletproof Coffee is a transformative morning ritual that fuses the rich, robust essence of freshly brewed coffee with the nourishing power of healthy fats. Originating from the pioneering Keto lifestyle and inspired by Himalayan butter tea,this creamy,energizing elixir fuels your brain and body with sustained energy and mental clarity. As someone who began crafting this blend during intense creative mornings, I can attest that it brightens the grind and elevates focus, making it the ultimate start to any day.
Prep and Cook Time
- Planning: 5 minutes
- Brewing: 5 minutes
- Total Time: 10 minutes
Yield
- 1 generous serving (12-16 oz)
Difficulty Level
- Easy – perfect for beginners and seasoned keto enthusiasts alike
Ingredients
- 1 cup (240ml) freshly brewed hot coffee - choose your favorite medium to dark roast for depth
- 1 tablespoon grass-fed unsalted butter – essential for that creamy texture and healthy fats
- 1 tablespoon MCT oil - for fast-absorbing energy and cognitive boost
- Optional: 1 teaspoon vanilla extract or cinnamon for subtle warmth
- Optional: A pinch of sea salt – enhances flavor and balances sweetness
instructions
- Brew fresh coffee using your preferred method (French press, pour-over, or espresso).For best results, grind whole beans just before brewing to unlock maximum aroma and flavor.
- Immediately transfer the hot coffee to a sturdy blender or use an immersion blender directly in your mug to prepare for emulsifying.
- Add the grass-fed butter and MCT oil to the coffee. This combination is the cornerstone of keto bulletproof coffee‘s creamy texture and sustained energy release.
- Blend on high for 20-30 seconds until the mixture is frothy, creamy, and homogenous. This step is crucial for emulsifying the fats, preventing oil separation, and creating a luscious mouthfeel.
- Pour into your favorite mug if blended separately, and garnish with a light dusting of cinnamon or a swirl of vanilla extract, if using. Add a pinch of sea salt to elevate the flavors subtly.
- Serve immediately to enjoy the full sensory experience of warmth, creaminess, and invigorating aroma.
Tips for Success
- Use freshly ground coffee beans for the most vibrant flavor and antioxidant properties.Pre-ground coffee can lose nuances and potency.
- Stick to grass-fed butter for the optimal fatty acid profile and creaminess – avoid margarine or regular butter with additives.
- If you’re new to MCT oil, start with 1 teaspoon and gradually increase to avoid digestive discomfort.
- Blend thoroughly to achieve that signature smooth texture; skipping this can result in oil floating on top rather than emulsifying.
- Try adding a teaspoon of collagen peptides to boost protein and support joint and skin health.
- Make ahead tip: Prepare your ingredients the night before, keep the coffee hot, and blend fresh in the morning for convenience and peak freshness.
serving Suggestions
Present your keto bulletproof coffee in a clear glass mug to showcase its creamy, golden hues, enhancing the anticipation of that first sip. For added visual appeal, sprinkle a pinch of cinnamon or cacao powder on top. Pair it with a handful of mixed nuts or a keto-friendly almond biscotti for a balanced, satisfying breakfast combo that prolongs fullness throughout your morning hustle.
| Nutrient | Per Serving |
|---|---|
| Calories | 230 |
| Protein | 0.5g |
| Carbohydrates | 0g |
| Fat | 25g |
Discover more keto-friendly snack ideas here to complement your energy-packed morning. For additional science-backed insights on healthy fats and cognitive performance, check out Harvard Health’s comprehensive guide.

Q&A
Q&A: Keto Bulletproof Coffee - Fuel Your Day with Healthy Fats
Q1: What exactly is Keto Bulletproof Coffee?
A1: Keto bulletproof Coffee is a creamy,energizing blend of high-quality coffee,grass-fed butter,and MCT oil. Designed to kickstart your day with healthy fats, its a staple for many following a ketogenic lifestyle, providing sustained energy without the sugar crash of conventional breakfast options.
Q2: Why add butter and MCT oil to coffee?
A2: Butter, especially grass-fed, offers rich omega-3s and fat-soluble vitamins, while MCT (Medium Chain Triglyceride) oil is a fast-burning fat that quickly converts to ketones-an alternative energy source your brain loves. Together, they create a velvety coffee experience that fuels both body and mind, promoting mental clarity and lasting fullness.Q3: How does Keto Bulletproof Coffee fit into a ketogenic diet?
A3: On keto, your body prioritizes fat over carbs for energy.Since Bulletproof Coffee is loaded with healthy fats and contains minimal carbs, it helps maintain ketosis-the metabolic state where your body efficiently burns fat. It’s an easy way to increase fat intake, especially if you’re skipping breakfast or want a low-carb morning boost.
Q4: Can Keto Bulletproof Coffee replace breakfast?
A4: Many keto enthusiasts use it as a satisfying breakfast substitute because it curbs hunger for hours. The combination of caffeine and fats can jumpstart metabolism and keep energy steady. However, some people prefer pairing it with a light keto-friendly meal for added nutrients-listen to your body!
Q5: Are there any potential downsides to drinking keto Bulletproof Coffee?
A5: While it’s a powerhouse for many, Bulletproof Coffee is calorie-dense.Overconsumption can lead to unwanted weight gain if not balanced within your daily macros. also, those sensitive to caffeine or new to high-fat diets should introduce it gradually to avoid digestive discomfort.
Q6: How do I make Keto Bulletproof Coffee at home?
A6: It’s simple! Brew 1 cup of your favorite hot coffee. In a blender, combine the coffee with 1-2 tablespoons of grass-fed butter and 1 tablespoon of MCT oil. Blend for 20-30 seconds until frothy and smooth. Pour into your favorite mug and savor the creamy,energizing goodness!
Q7: Can I customize my Keto Bulletproof Coffee?
A7: Absolutely! Many add a pinch of cinnamon,vanilla extract,or a dash of cocoa powder for extra flavor. Some swap butter for ghee or add collagen peptides for an added protein boost. The key is to keep it low-carb and high-fat to stay within keto guidelines.
Q8: How soon will I notice the effects of Keto Bulletproof Coffee?
A8: Most people feel a noticeable energy lift and mental sharpness within 15-30 minutes after drinking it. Regular consumption can enhance fat adaptation and support your ketogenic goals over time, turning your morning coffee ritual into a powerful daily habit.
Whether you’re a keto veteran or coffee lover curious about healthy fats, Keto Bulletproof Coffee is an indulgent yet functional way to fuel your day-one buttery sip at a time.
To Wrap It Up
As you embark on your journey with keto bulletproof coffee, remember it’s more than just a morning ritual-it’s a deliberate choice to fuel your body with nourishing, healthy fats that ignite both mind and metabolism. By blending quality coffee, grass-fed butter, and MCT oil, you create a powerhouse beverage that supports sustained energy, mental clarity, and vibrant vitality. So next time you crave that perfect pick-me-up, reach for this creamy, satisfying concoction and let your day unfold fueled by fat, focus, and flavor. Cheers to turning your coffee routine into a wellness ritual!
Power-Packed Flourless Banana Pancakes with 40g+ Protein redefine breakfast by combining wholesome ingredients into a vibrant, nourishing start to your day. Rooted in clean eating and grain-free traditions, these pancakes transform simple bananas and protein-rich staples into fluffy, satisfying stacks that fuel your body and delight your taste buds. Whether you’re an athlete, a busy professional, or simply a pancake lover seeking a nutritious twist, this recipe delivers a powerhouse of flavor and energy, all without flour or guilt.
Prep and Cook Time
- Prep Time: 10 minutes
- Cook Time: 10 minutes
- Total Time: 20 minutes
Yield
Serves 2 hearty portions (makes approximately 6 medium pancakes)
difficulty Level
Easy – perfect for beginners and fast weekday mornings.
Essential Ingredients for Maximum Protein and Flavor
- 2 large ripe bananas (for natural sweetness and moisture)
- 4 large eggs (high-quality protein and structure)
- 1 scoop (30g) vanilla whey or plant-based protein powder (adds depth and boosts protein content)
- 2 tbsp almond flour (grain-free base, enhances texture)
- 1 tsp baking powder (for a gentle rise and fluffy consistency)
- 1/2 tsp ground cinnamon (warmth and aroma)
- Pinch of sea salt (balances sweetness)
- 1 tsp vanilla extract (intensifies flavor)
- Coconut oil or avocado oil, for greasing
Crafting the Perfect Protein-Boosted Pancake Batter
Begin by thoroughly mashing the bananas in a mixing bowl until smooth but slightly chunky-it creates a natural sweetness and moist base without any flour. Crack in the eggs, whisking briskly to incorporate air, giving the pancakes a lighter texture. Next, sift in the protein powder, almond flour, baking powder, cinnamon, and salt to ensure even mixing and clump-free batter. Add the vanilla extract last for a fragrant finish.
Combine everything with a spatula or hand mixer until you achieve a thick, slightly elastic batter that holds together when scooped. This batter’s richness, courtesy of eggs and protein powder, means every bite is indulgent yet balanced with natural banana flavor.
Tips for Cooking and Serving High-Protein Banana Pancakes
Heat a non-stick skillet over medium heat and lightly grease with coconut or avocado oil. Pour 1/4 cup spoonfuls of batter onto the pan, leaving space between each pancake. Cook each side for 2-3 minutes or until golden brown spots appear and edges look set. Flip carefully using a thin spatula to maintain the pancake’s delicate structure.
To keep pancakes warm and soft, place them on a baking tray in a low oven (around 90°C / 200°F) while cooking subsequent batches.
Serving Suggestions
- Top with fresh berries,chopped nuts,and a drizzle of pure maple syrup or almond butter.
- For an extra protein hit, add a dollop of Greek yogurt or a spoonful of cottage cheese.
- Sprinkle chia seeds or hemp hearts for added crunch and omega-3 benefits.
- Serve alongside a green smoothie or a glass of your favorite nut milk to round out the meal.
Chef’s Notes: tips for Success
- Ingredient swaps: Use pea or rice protein powder for plant-based alternatives; oat flour can replace almond flour if preferred.
- Consistency check: If batter feels too thick,add a splash of almond milk or water to loosen slightly.
- Flipping finesse: Wait until bubbles form on the batter’s surface before flipping to avoid breaking.
- Make ahead: Batter can be mixed and refrigerated overnight; just stir gently before cooking.
- Storage: Leftover pancakes freeze well; reheat in a toaster or skillet for a quick reprise.
| Nutrient | Per Serving (3 pancakes) |
|---|---|
| calories | 320 kcal |
| Protein | 42g |
| Carbohydrates | 25g |
| fat | 9g |
Elevate your breakfast routine with these power-packed flourless banana pancakes, a nourishing blend of natural ingredients designed to satisfy cravings and fuel your day with more than 40 grams of protein.For more wholesome breakfast ideas,check out our High-Protein Breakfast Recipes. Learn more about the benefits of plant-based proteins at EatRight.org.

Q&A
Q&A: Power-Packed Flourless Banana Pancakes with 40g+ Protein
Q1: What makes these banana pancakes “power-packed”?
A1: These pancakes are not your average breakfast treat-they pack over 40 grams of protein per serving! By using protein-rich ingredients like eggs,Greek yogurt,and a high-quality protein powder,you get a fluffy,flavorful stack that fuels your body and satisfies your hunger for hours.
Q2: Why flourless? isn’t flour essential for pancakes?
A2: Traditional flour provides structure, yes-but these pancakes rely on the natural binding power of mashed bananas, eggs, and protein powder.Eliminating flour makes them gluten-free,lighter on carbs,and frequently enough easier to digest,all while keeping texture and taste on point.
Q3: Can I use any banana for these pancakes?
A3: Ripe bananas are your best friends here! The riper,the sweeter and softer,which means easier mashing and natural sweetness without the extra sugar. Overripe bananas with brown spots are perfect-they add depth of flavor and moisture.Q4: What type of protein powder works best?
A4: Whey or plant-based protein powders both do the trick, but pick one with a neutral or complementary flavor. Vanilla-flavored powders add a nice sweetness and aroma, while unflavored keep things simple. Avoid powders with artificial additives to keep your pancakes clean and wholesome.
Q5: Are these pancakes suitable for meal prep?
A5: Absolutely! They reheat beautifully in a toaster or skillet, making them a great grab-and-go option for busy mornings. Plus, their high protein content keeps you energized, helping you power through your day.
Q6: can I customize these pancakes with add-ins?
A6: Of course! Toss in cinnamon, nutmeg, or a handful of chopped nuts or berries for extra flavor and texture. Just be mindful of added calories if you’re tracking macros, but a little creativity makes breakfast even more enjoyable.
Q7: How do these pancakes fit into a fitness or weight-loss plan?
A7: The notable protein count helps build and repair muscle, supports metabolism, and keeps you feeling full longer. Plus,the natural sugars in banana provide lasting energy without a crash. they’re a balanced choice that supports both performance and healthy eating.
Q8: What’s the secret to getting the perfect pancake texture without flour?
A8: It’s all about mixing gently and letting the batter rest a few minutes so the protein powder hydrates. Cooking on medium-low heat allows the pancakes to cook through without burning. The banana and eggs create a tender, moist crumb that rivals any traditional pancake!
Q9: Can kids enjoy these pancakes too?
A9: Definitely! Kids love the sweet banana flavor and fluffy texture. Plus, it’s a sneaky way to slip extra protein and nutrients into their breakfast. Just adjust portion sizes and toppings to suit their taste.Q10: Where can I find a reliable recipe for these protein-packed flourless banana pancakes?
A10: Look for recipes that balance simple whole-food ingredients with effective protein sources-think ripe bananas, eggs, Greek yogurt, and your favorite protein powder. Many fitness and nutrition blogs offer tested recipes, or you can experiment yourself using these principles!
To Conclude
As you savor the last bite of these power-packed flourless banana pancakes, remember you’re not just indulging in a delicious breakfast treat-you’re fueling your body with over 40 grams of muscle-loving protein and natural, wholesome ingredients. Perfectly balancing taste and nutrition, this recipe transforms ordinary mornings into energizing starts, proving that healthy can be both simple and satisfying. So, next time you crave pancakes, skip the flour and embrace a stack that powers you through busy days and workouts alike. Your taste buds-and your muscles-will thank you!
]]>Energize Your Mornings with Almond Milk Matcha Latte Magic: Crafting the Perfect Cup
Energize your mornings with almond milk matcha latte magic – a vibrant, creamy fusion that marries ancient Japanese tradition with modern wellness. This latte elevates the humble morning brew into a colorful ritual, awakening your senses while delivering a nutrient-packed jolt of sustained energy without the jitters of coffee.
My first taste of this comforting green elixir was during a chilly autumn morning, where its velvety texture and subtly earthy matcha flavor instantly transformed my day. The natural sweetness of almond milk enriches the vibrant matcha, creating a harmonious balance that’s both soothing and invigorating. Weather you’re a longtime matcha lover or new to this trend, this homemade latte will easily become a cherished ritual in your daily routine.
Prep and Cook Time
Prep Time: 5 minutes
Cook Time: 5 minutes
Total Time: 10 minutes
Yield
Serves 2
Difficulty Level
Easy
Ingredients
- 2 teaspoons high-quality ceremonial grade matcha powder
- 2 cups unsweetened almond milk (preferably homemade or barista blend for creaminess)
- 1 tablespoon hot water (not boiling,about 175°F / 80°C)
- 1-2 teaspoons natural sweetener (maple syrup,agave,or honey to taste)
- ½ teaspoon vanilla extract (optional,for depth)
- Pinch of sea salt (to enhance flavors)
Instructions
- Prepare the matcha: Sift the matcha powder through a fine mesh sieve into a small bowl to prevent clumps and ensure a smooth latte.
- Add hot water: Pour 1 tablespoon of hot water (about 175°F/80°C) over the sifted matcha. Using a bamboo whisk (chasen) or a small electric frother, whisk vigorously in a zigzag motion until the matcha dissolves fully and a frothy layer forms on top.
- Warm the almond milk: In a small saucepan, gently heat the almond milk over medium-low heat. Avoid boiling; warm until steaming and just starting to bubble at the edges,about 3-4 minutes. Stir occasionally to prevent skin from forming.
- Sweeten and flavor: Remove from heat, stir in your preferred sweetener, vanilla extract, and a pinch of sea salt. Taste and adjust to personal preference.
- Combine and froth: Pour the warm almond milk slowly into the bowl with the prepared matcha, holding back the foam with a spoon. Then, spoon the foam on top to create a luscious texture.
- Serve immediately: pour the almond milk matcha latte into your favorite cup. For an extra touch, dust lightly with matcha powder or cinnamon.
Tips for Success
- Use ceremonial grade matcha for the best flavor and vibrant green color; culinary grades can be bitter and less smooth.
- If you lack a bamboo whisk, a small milk frother or even a handheld electric mixer can work just as well.
- Adjust the sweetness gradually-matcha’s natural bitterness varies, so start with less and build up.
- For a creamier latte, opt for barista-style almond milk that steams well and has added thickeners like sunflower lecithin.
- Make ahead: Whisk matcha with hot water and refrigerate. Warm almond milk just before serving for a quick morning boost.
Serving Suggestions
This almond milk matcha latte shines when served in a clear glass mug, showcasing its vibrant jade-green hues and frothy top. garnish with a sprinkle of matcha powder or edible gold dust for an elegant finish. Pair it with light, complementary bites like almond biscotti, toasted coconut slices, or a fresh fruit bowl to create an invigorating breakfast or afternoon pick-me-up.
| Nutrient | Amount (per serving) |
|---|---|
| Calories | 90 kcal |
| protein | 2 g |
| Carbohydrates | 6 g |
| Fat | 7 g |

To deepen your green wellness journey,explore our detailed guide to matcha benefits and discover scientifically-backed insights into this potent antioxidant powerhouse at Healthline.
Q&A
Q&A: Energize Your Mornings with Almond Milk matcha Latte Magic
Q1: What makes almond milk matcha latte a magical morning drink?
A: The magic lies in the perfect blend of vibrant matcha and creamy almond milk. Matcha, a finely ground green tea powder, is packed with antioxidants and a gentle caffeine boost that awakens your mind without the jitters.Almond milk adds a smooth, nutty richness while being dairy-free and low in calories-making this latte both energizing and effortlessly delicious.
Q2: How does almond milk complement matcha in this latte?
A: Almond milk’s naturally subtle sweetness and velvety texture harmonize beautifully with matcha’s earthy, slightly grassy notes. Unlike dairy, almond milk doesn’t overpower the delicate flavor of matcha; instead, it creates a light, creamy canvas that elevates every sip.
Q3: Can this latte help sustain energy throughout the morning?
A: Absolutely! Matcha provides a steady release of caffeine thanks to its unique combination of theanine and antioxidants. This means you get an alert, calm focus without the energy crash frequently enough associated with coffee. Paired with almond milk’s nourishing nutrients, it supports sustained vitality well into your day.
Q4: Is almond milk matcha latte suitable for everyone?
A: Yes! It’s a great choice for vegans, lactose-intolerant individuals, or anyone looking for a plant-based, low-sugar option to coffee. Plus, it’s easily customizable-sweeten it with natural honey or maple syrup, or spice it up with a dash of cinnamon or vanilla for a personal twist.
Q5: How can I make my own almond milk matcha latte at home?
A: Making this magic in your own kitchen is simple. Whisk 1 teaspoon of high-quality matcha powder with a small amount of hot (not boiling) water until frothy. Warm 1 cup of almond milk and pour it over the matcha. Sweeten or spice as you like, then stir and enjoy your energizing morning ritual!
Q6: Any tips for choosing the best ingredients?
A: Opt for ceremonial-grade matcha for the freshest taste and maximum health benefits. Choose unsweetened almond milk to keep calories low and control your sweetness level. Freshly whisking the matcha ensures a smooth, lump-free latte packed with flavor.
Q7: Could almond milk matcha latte replace my morning coffee?
A: For many, yes-it’s a fantastic alternative that delivers both energy and calm alertness without the acidity or crash of coffee. Its unique blend of nutrients and gentle caffeine kick can transform your morning routine into a mindful, nourishing moment.
Energize your mornings with this enchanting almond milk matcha latte and experience a delicious new way to start your day-full of vitality, flavor, and a touch of magic!
In Conclusion
As the sun rises and your day begins to take shape, let the vibrant blend of almond milk and matcha latte infuse your mornings with a gentle burst of energy and a touch of magic.This harmonious duo not only awakens your senses but also nurtures your body with nourishing antioxidants and creamy goodness.So, next time you crave a revitalizing ritual, reach for a cup of almond milk matcha latte-a simple yet enchanting way to energize your mornings and embrace each day with calm focus and renewed vitality. Cheers to mornings made magical!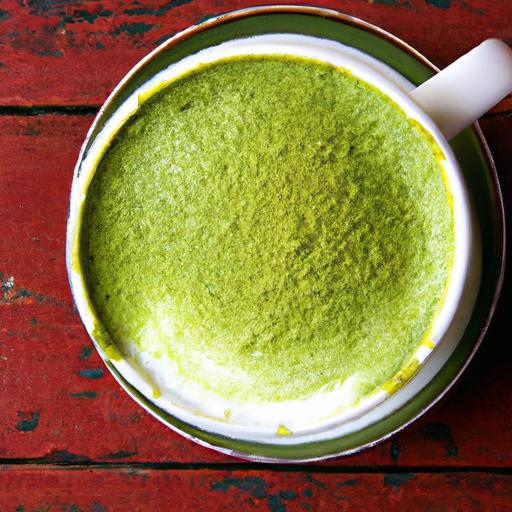
Warm Up Your Soul with Classic Chicken noodle Soup Recipe has been a timeless remedy and comfort food for generations. Rooted deeply in tradition, this dish carries the warmth of homemade care, combining tender chicken, fragrant herbs, and silky noodles to create a bowl that feels like a loving embrace on a chilly day or when health calls for gentle nourishment.
Prep and Cook Time
- Preparation: 15 minutes
- Cooking: 1 hour 15 minutes
- Total Time: 1 hour 30 minutes
Yield
Serves 6 generous bowls
Difficulty Level
Easy – Perfect for cooks of all skill levels seeking soulful nourishment.
Choosing the Perfect Ingredients for Maximum Comfort
To truly warm up your soul with classic chicken noodle soup recipe, the heart beats in the ingredients chosen. Opt for a whole organic chicken or bone-in chicken thighs for rich, flavorful broth. Fresh vegetables like carrots, celery, and onions build the essential aromatic base, while fresh or egg noodles deliver that perfect tender bite.Don’t forget herbs such as fresh thyme, parsley, and a bay leaf to elevate your broth’s depth. A sprinkle of sea salt and cracked black pepper rounds off the true comfort.
Ingredients
- 1 whole organic chicken (about 3-4 lbs), cleaned and patted dry
- 2 large carrots, peeled and sliced into rounds
- 3 celery stalks, chopped
- 1 large yellow onion, quartered
- 4 garlic cloves, smashed
- 8 cups cold water
- 2 bay leaves
- 5-6 sprigs fresh thyme
- 1 bunch fresh parsley, tied
- Salt and fresh ground black pepper, to taste
- 2 cups egg noodles (or substitute with gluten-free noodles)
- 2 tablespoons olive oil (optional, for sautéing vegetables)
Step by Step Guide to Making Classic Chicken Noodle Soup
- Prepare the broth: Place the whole chicken in a large stockpot and cover with 8 cups of cold water. Bring to a gentle boil over medium heat, skimming any foam off the surface for a clear broth.
- Add aromatics: Stir in the carrots, celery, onion, garlic, bay leaves, and thyme sprigs. Reduce heat to low and simmer uncovered for about 60 minutes, allowing flavors to meld beautifully.
- Remove chicken and strain broth: Carefully lift the chicken out and set aside to cool. Strain the broth through a fine sieve into another pot, discarding solids (reserve a few carrot and celery pieces if desired for texture).
- Shred the chicken: Once cool enough to handle, strip the meat from bones and skin into bite-sized pieces. Discard bones and skin.
- Cook the noodles: Bring the strained broth to a gentle boil and add egg noodles. Cook according to package instructions until al dente-usually 6 to 8 minutes.
- Combine and season: Stir the shredded chicken back into the pot. Add salt and pepper to taste. Simmer for another 2-3 minutes to combine flavors.
- Finish with fresh parsley: Just before serving,stir in chopped parsley for a vibrant burst of color and freshness.
Tips and Variations to Elevate Your Soul-Soothing Bowl
- Make Ahead: Prepare the broth one day in advance. Refrigerate overnight and skim off any solidified fat in the morning before reheating.
- Variation: Swap noodles for rice or gluten-free pasta to suit dietary needs without sacrificing comfort.
- Vegetarian Option: Replace chicken broth with hearty vegetable stock and add mushrooms for umami depth.
- Boost Flavor: Roast the chicken and vegetables beforehand to deepen the soup’s aromatic profile.
- Herb Twist: Experiment with fresh dill or rosemary for a subtly different herbal note.
Serving Suggestions
Serve piping hot in rustic bowls, garnished with a sprinkle of freshly chopped parsley or thyme. A wedge of crusty sourdough bread or garlic toast pairs beautifully, perfect for dipping. For a zesty contrast, offer lemon wedges on the side to brighten each spoonful.
| Nutritional Info (per serving) | Calories | Protein | Carbs | Fat |
|---|---|---|---|---|
| Classic Chicken Noodle Soup | 230 kcal | 22 g | 20 g | 6 g |
For those eager to explore more nourishing homemade broths, discover our guide on How to Make Homemade Chicken Broth. Meanwhile, authoritative resources such as the Serious Eats Chicken Noodle Soup Article can deepen your culinary understanding.

Q&A
Q&A: Warm Up Your Soul with Classic Chicken Noodle Soup Recipe
Q1: Why is chicken noodle soup considered such a comforting classic?
A1: Chicken noodle soup has an almost magical ability to soothe both body and spirit. Its warm broth, tender chicken, and hearty noodles create a cozy hug in a bowl, evoking nostalgic memories of home-cooked meals and care. Beyond taste, it nourishes with wholesome ingredients that comfort the soul and boost wellness, especially on chilly or under-the-weather days.
Q2: What makes a chicken noodle soup recipe truly “classic”?
A2: At its heart, a classic chicken noodle soup sticks to simple, quality ingredients: succulent chicken, rich broth, soft yet tender noodles, and a medley of aromatic vegetables like carrots, celery, and onions. The secret lies in slow simmering to meld flavors perfectly while maintaining a delicate balance – nothing too fancy, just timeless goodness.
Q3: Can I customize this recipe without losing its soul-warming qualities?
A3: Absolutely! The beauty of this soup is its versatility. Feel free to add herbs like thyme or parsley for a fragrant boost, swap in whole wheat or egg noodles for texture, or even toss in some garlic or ginger for a subtle kick. provided that you keep the comforting base of chicken and broth, the soul-warming essence remains intact.
Q4: How do I ensure the noodles don’t get mushy?
A4: To keep noodles perfectly al dente, cook them separately and add them just before serving. This prevents them from soaking up too much broth and turning soggy. If you prefer cooking noodles in the soup, add them in the last 10-15 minutes to retain some bite without compromising the rich broth.
Q5: is homemade chicken noodle soup better than store-bought or canned varieties?
A5: Homemade chicken noodle soup is like a love letter to your taste buds – fresh, fragrant, and customizable. Unlike store-bought or canned options that can be salty, preservative-laden, or lack depth of flavor, homemade soup delivers a pure, wholesome experience that warms the soul and fills the kitchen with inviting aromas.
Q6: What’s the best way to store and reheat leftover chicken noodle soup?
A6: Store leftovers in an airtight container in the refrigerator for up to 3 days or freeze for longer preservation. When reheating, gently warm on the stovetop to avoid overcooking the noodles and chicken. If noodles were cooked separately, add them in at the end for that fresh-bite texture.
Q7: Can this soup be made ahead of time for busy weeknights?
A7: Definitely! Chicken noodle soup is a fantastic make-ahead meal. Prepare the broth and chicken in advance, store separately from the noodles, and assemble quickly when hunger strikes. It’s the perfect antidote to a hectic day – nourishing,speedy,and ever-so-soulful.
With these simple Q&A insights, your journey into making classic chicken noodle soup becomes not just a cooking task, but a comforting ritual – one spoonful at a time.
Key Takeaways
As the comforting aroma of simmering broth fills your kitchen and the tender noodles swirl with juicy chicken and vibrant vegetables, this classic chicken noodle soup does more than just satisfy hunger-it nourishes the soul.Whether you’re seeking solace on a chilly day or simply craving a taste of home, this timeless recipe reminds us that some flavors never go out of style. so next time life feels a little overwhelming, let a warm bowl of chicken noodle soup be your humble remedy-a delicious embrace that warms from the inside out.
Energize your day with a refreshing low-carb green smoothie that harnesses the vibrant power of nutrient-packed greens for truly lasting energy. This invigorating blend brings together nature’s most potent greens with carefully selected,flavor-enhancing additions that balance both taste and nutrition.Inspired by my mornings spent experimenting with garden-fresh produce,this smoothie transforms a hectic start into a moment of silky,revitalizing bliss.
Prep and Cook Time
Readiness: 10 minutes
Cook Time: 0 minutes (no cooking required)
Yield
Serves 2 hearty portions
Difficulty Level
Easy – Blend, pour, and enjoy!
Ingredients
- 1 cup fresh baby spinach leaves, tightly packed
- 1/2 cup kale, ribs removed and chopped
- 1/2 medium avocado, peeled and pitted
- 1/2 cup cucumber, sliced
- 1/4 cup fresh parsley, loosely packed
- 1 tablespoon chia seeds
- 1 tablespoon freshly squeezed lemon juice
- 1/2 teaspoon grated fresh ginger
- 1 cup unsweetened almond milk (or your preferred unsweetened low-carb plant milk)
- 2 teaspoons powdered erythritol (optional, for subtle sweetness)
- Ice cubes, to preference for chill and texture
Instructions
- Prepare your greens: Rinse the spinach, kale, and parsley thoroughly to remove any grit. Pat dry with a kitchen towel for a smoother blend.
- Load the blender: Begin by adding the almond milk to the blender jar-the liquid helps the blades move effortlessly, ensuring a creamy texture.
- Add the greens: Layer the spinach, kale, and parsley over the almond milk, followed by the cucumber slices and avocado for healthy fats that contribute to lasting satiety.
- Enhance with power ingredients: Add chia seeds, fresh ginger, lemon juice, and erythritol (if using) to brighten the flavor and pack an antioxidant punch.
- Blend to perfection: Secure the lid and blend on high for about 45 seconds to 1 minute,or until the mixture is silky smooth and vibrant green. Pause and scrape down the sides if needed, then blend again.
- Adjust and serve: Taste the smoothie-if you desire an extra zing, add an additional splash of lemon juice. For a colder beverage, toss in a few ice cubes and briefly reblend.
- Pour and enjoy: Serve promptly in your favorite glass, garnished with a small sprig of parsley or a thin cucumber ribbon for a fresh, elegant touch.
Tips for Success
- Freshness counts: Always use fresh, crisp greens for the best flavor and maximal nutrient retention.
- Customize your greens: Substitute kale with Swiss chard or collard greens if you prefer a milder taste.
- Boost protein: Add a scoop of unflavored or vanilla low-carb protein powder for a post-workout energy lift.
- Make-ahead magic: Prepare your ingredients the night before (washed and chopped) to save time on busy mornings.
- Texture tips: If your blender struggles, soak chia seeds for 10 minutes before blending to soften.
Serving Suggestions
Present your smoothie in a slender, clear glass to showcase its vivid green hue. Sprinkle a pinch of hemp seeds on top for an added crunch and visual appeal. Pair with a handful of mixed nuts or a small cheese cube for a balanced low-carb breakfast. This smoothie also makes a fantastic mid-morning refresher; pour into a portable bottle to energize your workday.
| Nutrient | Per Serving |
|---|---|
| Calories | 150 kcal |
| protein | 4 g |
| Carbohydrates | 8 g (Net Carbs ~5 g) |
| Fat | 11 g |

For more nourishing recipes perfect for active mornings, check out our Low-Carb Breakfast Ideas. To dive deeper into the benefits of leafy greens, the Harvard T.H. Chan School of Public Health offers extensive insights on vegetable nutrition.
Q&A
Q&A: Energize Your Day with a Refreshing Low-Carb Green Smoothie
Q1: Why choose a low-carb green smoothie to start the day?
A1: A low-carb green smoothie fuels your body without the sugar crash that high-carb breakfasts can bring. Packed with leafy greens, healthy fats, and protein, it provides steady energy, sharpens your focus, and keeps cravings at bay. It’s like a vibrant morning boost that wakes you up from the inside out!
Q2: What makes a green smoothie “low-carb”?
A2: Unlike traditional fruit-heavy smoothies, a low-carb green smoothie minimizes high-sugar fruits and replaces them with nutrient-dense veggies like spinach, kale, or cucumber. Adding healthy fats such as avocado or chia seeds and a moderate amount of protein helps balance blood sugar levels, making it perfect for those watching their carb intake.
Q3: Can you suggest a simple recipe to get started?
A3: Absolutely! Blend together one cup of fresh spinach, half an avocado, a quarter of a cucumber, a tablespoon of chia seeds, half a cup of unsweetened almond milk, and a squeeze of lemon juice.If you want a touch of natural sweetness, add a few drops of stevia or a small piece of green apple. Voila-your energizing green elixir is ready!
Q4: How does this smoothie support overall health beyond energy?
A4: Green smoothies deliver antioxidants, vitamins A and C, and fiber, which promote glowing skin, support digestion, and strengthen immunity.The healthy fats support brain function, while the low carb content helps regulate blood sugar and reduces inflammation. It’s a delicious way to nourish your body holistically.
Q5: Can this smoothie fit into different dietary lifestyles?
A5: Definitely! It’s naturally vegan, gluten-free, and keto-friendly when tailored properly. Swap ingredients to suit allergies or preferences-try coconut milk rather of almond, or add hemp seeds for extra protein. This smoothie is flexible and forgiving, making it easy to weave into a variety of diets.
Q6: When is the best time to enjoy this smoothie?
A6: Kickstart your morning with it for a clean, sustained energy boost. It also makes a great mid-afternoon pick-me-up, helping combat the 3 PM slump without weighing you down or causing an energy crash. Think of it as your anytime vitality potion!
Q7: Any tips for making the smoothie taste better?
A7: Fresh herbs like mint or parsley add an unexpected zing; a dash of cinnamon or ginger amps up the warmth and metabolism; and cold or frozen ingredients keep it crisp and refreshing. Experiment with combinations to find your signature sip!
Embrace this vibrant ritual, and you’ll find yourself energized, nourished, and ready to conquer the day-one green gulp at a time!
Closing Remarks
As the vibrant hues of your low-carb green smoothie swirl in the glass, so to does a newfound energy awaken within you-ready to power through the day with clarity and vitality. By embracing this refreshing blend of nutrient-packed greens and wholesome ingredients, you’re not just sipping a drink; you’re fueling a lifestyle that balances wellness with flavor.So next time you need a boost, remember: sometimes the simplest green can spark the brightest energy. Cheers to a day energized, refreshed, and wonderfully low-carb!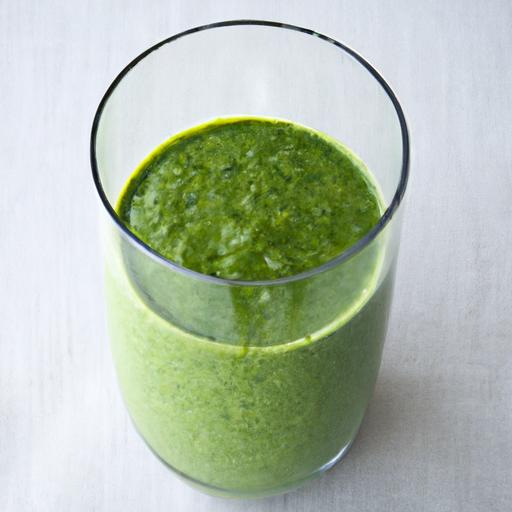
Boost Your Day with Nutrient-Packed Chia Seed Protein Pudding offers a vibrant start to your mornings or a revitalizing afternoon pick-me-up that nourishes your body and delights the senses. This wholesome pudding embraces the ancient superfood qualities of chia seeds, celebrated for their unique ability to swell into a luscious gel, delivering an unparalleled texture combined with powerhouse nutrition. Originating from customary South American diets, chia seeds have transcended time and cuisine, seamlessly integrating into modern wellness-focused recipes like this nutrient-rich protein pudding.
Prep and Cook Time
- Readiness: 10 minutes
- chilling: 2 to 4 hours (or overnight for best results)
- Total Time: Approximately 2 hours 10 minutes
Yield
- Serves 2 generous portions
Difficulty Level
- Easy – beginner-amiable
Ingredients
- 3 tablespoons chia seeds, preferably black or white
- 1 cup unsweetened almond milk (or any plant-based milk of choice)
- 1 scoop vanilla or unflavored plant-based protein powder (around 20-25g protein)
- 1 tablespoon pure maple syrup or honey (optional, adjust sweetness)
- 1 teaspoon vanilla extract
- Pinch of fine sea salt
- 1/2 teaspoon ground cinnamon (optional for warm spice note)
Instructions
- Combine liquids and flavor: In a medium-sized bowl, whisk together the almond milk, vanilla extract, maple syrup, protein powder, cinnamon, and sea salt untill perfectly smooth and no lumps remain.
- Incorporate chia seeds: Gradually add the chia seeds to the liquid mixture, stirring thoroughly to ensure every seed is fully dispersed and begins hydrating instantly.
- Initial rest: Let the mixture rest for 5 minutes, then whisk again to break up any clumps, promoting an even, creamy texture.
- Chilling phase: Cover the bowl with plastic wrap or transfer the pudding to an airtight container. Refrigerate for at least 2 hours, though overnight chilling yields a more silky consistency and fuller flavor integration.
- Final stir: Before serving,stir the pudding well to fluff it up. If too thick, add a splash of milk to loosen the texture to your liking.
Tips for Success
- Protein powder choice: Opt for natural, minimally flavored powders to avoid overpowering the subtle nuttiness of chia seeds.
- Soaking time: Don’t rush the chilling process; chia seeds require time to absorb liquid fully and develop that signature creamy pudding texture.
- Flavor variations: Experiment with cocoa powder for a chocolate twist,fresh citrus zest for brightness,or a pinch of cardamom for an exotic aroma.
- Make ahead: Prepare in larger batches and store in single-serving jars for rapid grab-and-go nutrition.
- Consistency adjustments: If you prefer a thinner pudding, add more milk; for thicker, increase chia seeds slightly, but be cautious to maintain balance.
Enhancing Flavor and Texture with Natural Additions
Once your pudding is perfectly set, elevate it with seasonal fruits like ripe mango, blueberries, or pomegranate arils for bursts of natural sweetness and vibrant color. Crunchy toppings such as toasted nuts, seed granola, or unsweetened coconut flakes introduce a delightful texture contrast that makes every spoonful intriguing. For an extra creamy swirl, dollop Greek yogurt or a spoonful of almond butter right before serving. thes enhancements don’t just boost flavor; they amplify the nutrient profile, aligning perfectly with your wellness goals.
Serving Suggestions
- Layer it up: Create a parfait by alternating chia pudding with layers of fresh berries and crunchy granola in a clear glass to showcase it’s inviting texture and vibrant colors.
- On-the-go jars: Pack your pudding in mason jars topped with sliced fruits and nuts for a smart, portable snack or breakfast.
- Garnish with herbs: Sprinkle fresh mint leaves or a zest of lemon for an aromatic finish.
- Pairing ideas: Complement with a warm cup of green tea or a fresh-pressed juice full of antioxidants.
| Nutrient | Per Serving |
|---|---|
| Calories | 220 kcal |
| Protein | 18 g |
| Carbohydrates | 12 g |
| Fat | 8 g |
For further inspiration on healthy breakfast recipes, explore our curated collection. To dive deeper into the science behind chia seeds’ nutritional powerhouse effects, consult this authoritative study from the National Institutes of Health.

Q&A
Q&A: Boost Your Day with nutrient-Packed Chia Seed Protein Pudding
Q1: What makes chia seed protein pudding such a powerful start to the day?
A1: Chia seed protein pudding is a nutritional powerhouse! Packed with omega-3 fatty acids, fiber, antioxidants, and protein, it fuels your body with lasting energy.The combination of chia seeds and protein powder creates a creamy,satisfying texture that keeps hunger at bay and brain fog away-perfect for powering through busy mornings.
Q2: How do chia seeds contribute to the overall health benefits of this pudding?
A2: Chia seeds are tiny but mighty! They swell up when soaked, turning into a gel-like texture that slows digestion for steady blood sugar levels. Their high fiber content supports digestive health, while omega-3s promote heart and brain health. Plus,they’re loaded with minerals like calcium and magnesium to keep bones strong.
Q3: Can you customize chia seed protein pudding to fit different dietary needs?
A3: Absolutely! Whether you’re vegan, gluten-free, or dairy-free, chia seed protein pudding can be tailored to your lifestyle. Use plant-based protein powders like pea or hemp for a vegan version, swap cow’s milk for almond, coconut, or oat milk, and sweeten naturally with fruits or a touch of maple syrup for a wholesome treat.
Q4: What’s the best way to prepare chia seed protein pudding for maximum nutrition and flavor?
A4: Start with a good scoop of protein powder, a generous tablespoon or two of chia seeds, your choice of milk, and natural sweeteners or flavor boosters like vanilla extract or cocoa powder. Mix well and refrigerate overnight. This “overnight” step lets the chia seeds absorb liquid and develop their signature creamy texture. In the morning, top it with fresh berries, nuts, or coconut flakes for extra crunch and nutrients.
Q5: How does incorporating chia seed protein pudding into your routine impact your daily energy levels?
A5: Eating chia seed protein pudding supports steady energy release thanks to its balanced blend of protein, fiber, and healthy fats. Unlike sugary breakfasts that spike and crash your blood sugar, this pudding sustains vitality throughout the morning, enhancing focus and mood. Its a gentle yet effective fuel that transforms your day from sluggish to vibrant.
Q6: is chia seed protein pudding suitable for people aiming to lose weight or build muscle?
A6: Yes! For weight loss, its high fiber content promotes fullness and reduces cravings. For muscle building, the added protein provides essential amino acids to aid recovery and growth. It’s a versatile snack or meal that aligns perfectly with various fitness goals while delighting your taste buds.
Q7: Where can one find quality chia seeds and protein powders to make this pudding at home?
A7: Look for organic, non-GMO chia seeds at health food stores or online. For protein powders, choose options with minimal additives and transparent ingredient lists-whey, pea, hemp, or brown rice proteins are popular. many brands now offer blends designed for improved taste and digestibility, making your pudding prep effortless and delicious.
Feel inspired? whip up a jar of chia seed protein pudding tonight and wake up to a day fueled by nutrition, creativity, and vibrant energy!
Closing Remarks
Incorporating chia seed protein pudding into your daily routine is more than just a tasty choice-it’s a vibrant, nutrient-packed boost that fuels your body and mind. With its blend of fiber, protein, and essential omega-3s, this simple yet powerful pudding transforms ordinary meals into nourishing experiences. So next time you need a quick pick-me-up or a wholesome start,let chia seeds be your secret ingredient to sustained energy and well-being. Your day deserves a supercharged ending, and with chia seed protein pudding, that’s exactly what you’ll get.
Sip Smart: Green Smoothie Recipes That Fuel Weight Loss begin with a foundation of nutrient-dense greens that not only pack a punch in flavor but also supercharge your body with essential vitamins and minerals. These vibrant smoothies are crafted to preserve delicate nutrients through gentle blending techniques, ensuring every sip is as nourishing as it is indeed delicious. From garden-fresh kale leaves to tender spinach, each ingredient is selected for its ability to support lasting weight loss goals while delighting your palate with refreshing complexity.
Prep and Cook Time
Prep: 10 minutes | Blend: 3 minutes | total: 13 minutes
Yield
Serves 2 smoothie servings
Difficulty Level
Easy – Perfect for beginner and seasoned smoothie enthusiasts alike
Ingredients
- 2 cups fresh baby spinach, lightly packed
- 1 cup kale leaves, stems removed and chopped
- 1 medium ripe banana, peeled
- 1/2 cup frozen pineapple chunks
- 1 tablespoon chia seeds
- 1 tablespoon freshly grated ginger
- 1 cup unsweetened almond milk (or any plant-based milk)
- 1/2 cup cold water
- Juice of 1/2 lemon, for brightness
- Optional: 1 scoop plant-based protein powder for added satiety
Instructions
- Rinse the greens thoroughly under cold water to remove any grit.Pat dry with a clean kitchen towel or use a salad spinner for crispness.
- Load the blender starting with the almond milk and water – this liquid base helps the blades move smoothly and prevents over-processing your delicate greens.
- Add the baby spinach and kale on top of the liquids. Layering helps the greens blend more uniformly without overheating them.
- Next, add the banana, frozen pineapple, chia seeds, and grated ginger. These ingredients will add natural sweetness, texture, and a gentle kick.
- pour in the lemon juice. It acts as a natural preservative and helps brighten all the flavors.
- Blend on medium speed for 30 seconds, then increase to high for 1-2 minutes, or until the smoothie achieves a creamy, pourable consistency. Pause and scrape down the sides as needed to incorporate all ingredients evenly.
- Optional: Stir in a scoop of protein powder after blending, then pulse briefly to combine without over-blending.
- Serve promptly to enjoy the maximum vitamin content and refreshing aroma.
Tips for Success
- Use fresh, vibrant greens for the best flavor and nutrient retention; older leaves can taste bitter and lack vibrancy.
- If the smoothie is too thick, add more water or almond milk in small increments until your desired consistency is reached.
- For creamier texture, swap banana with half an avocado or add 2 tablespoons of Greek yogurt (if dairy is acceptable).
- Preserve vitamins by blending gently. High-powered blenders are great, but avoid blending for more than 2 minutes to prevent heat-sensitive nutrient loss.
- Make-ahead tip: Prepare ingredients in advance and freeze them in portions; blend with fresh liquids in the morning for a quick, fresh start.
Serving Suggestions
Pour your vibrant green smoothie into tall glass tumblers and garnish with a sprinkle of chia seeds, a thin slice of lemon on the rim, and a small sprig of fresh mint. Pair it with a handful of raw almonds or a slice of whole-grain toast topped with avocado for a balanced, energizing meal. Perfect for breakfast on-the-go or a refreshing afternoon boost!

| Nutrient | Per Serving |
|---|---|
| Calories | 180 kcal |
| Protein | 5 g |
| Carbohydrates | 30 g |
| Fat | 3 g |
| Fiber | 6 g |
For more nutrient-packed recipes, check out our Healthy Breakfast Smoothies that complement your weight loss journey. To understand how greens benefit metabolism, see this detailed explanation from Healthline.
Q&A
Q&A: Sip Smart – Green Smoothie Recipes That Fuel Weight loss
Q1: Why are green smoothies considered effective for weight loss?
A: Green smoothies combine nutrient-dense leafy greens with fiber-rich fruits and healthy fats, creating a low-calorie, high-fiber drink that keeps you full longer. This helps curb cravings, stabilize blood sugar, and boost metabolism, all key players in effective weight loss.
Q2: What greens work best in weight loss smoothies?
A: Spinach and kale are the reigning champions. Spinach is mild and packed with iron and vitamins,while kale offers a robust dose of antioxidants and fiber. Both blend smoothly and provide bulk without extra calories, making your smoothie both satisfying and slimming.
Q3: Can I add fruits without sabotaging my weight loss goals?
A: Absolutely! The trick is balance. Low-sugar fruits like berries, green apples, and kiwi add natural sweetness plus antioxidants and fiber. They keep your smoothie flavorful without a sugar spike, supporting steady energy levels and fat burning.
Q4: What are some secret ingredients to boost fat-burning?
A: Think metabolism boosters like ginger, cinnamon, and turmeric. Adding a pinch of these spices can ignite your digestive system. Also, a spoonful of chia seeds or flaxseeds delivers omega-3s and fiber, promoting satiety and fat metabolism.
Q5: How can I make my green smoothie more filling?
A: Incorporate a source of healthy fats and protein. Avocado, greek yogurt, or a scoop of plant-based protein powder can transform your smoothie from a snack to a meal, helping you stay full and energized throughout the day.
Q6: Are green smoothies suitable for daily consumption?
A: Yes, but variety is key. Drinking green smoothies daily can flood your body with essential nutrients,but rotating ingredients ensures a broad spectrum of vitamins and minerals,preventing flavor fatigue and nutritional gaps.
Q7: When’s the best time to sip a green smoothie for weight loss?
A: Mornings are prime time. A nutrient-packed green smoothie jumpstarts your metabolism and provides sustained energy. Post-workout smoothies also work well, aiding recovery while replenishing nutrients with minimal calories.
Q8: Can green smoothies replace meals?
A: They can, but mind the balance. A meal-replacement smoothie should have a good blend of carbs, proteins, and fats to keep you nourished. Or else,use them as healthy snacks or breakfast boosters to support your weight loss journey without feeling deprived.
Q9: Do I need a fancy blender to make these healthy concoctions?
A: Not at all! While high-speed blenders make silky smoothies, a standard blender works perfectly with fresh or frozen ingredients. The key is fresh, whole foods and the right combos – not gadgetry.
Q10: Any tips to keep green smoothies exciting?
A: Experiment with herbs like mint or basil,swap leafy greens,try different fruit combinations,and innovate with spices. Layer your smoothie with textures-think crunchy nuts or seeds on top-to delight your palate and keep your weight loss routine vibrant and fun.
Ready to sip smart? Embrace these green smoothie secrets and turn every sip into a step toward your healthiest self!
In Retrospect
As you blend your way through these vibrant green recipes, remember that smart sipping is more than just a trend-it’s a delicious step toward nourishing your body and supporting your weight loss goals. Each smoothie is a powerhouse of nutrients carefully crafted to fuel your day,curb cravings,and boost metabolism naturally. So go ahead, embrace the greens, experiment with flavors, and let every sip bring you closer to a healthier, energized you. Here’s to sipping smart and living well-one vibrant blend at a time.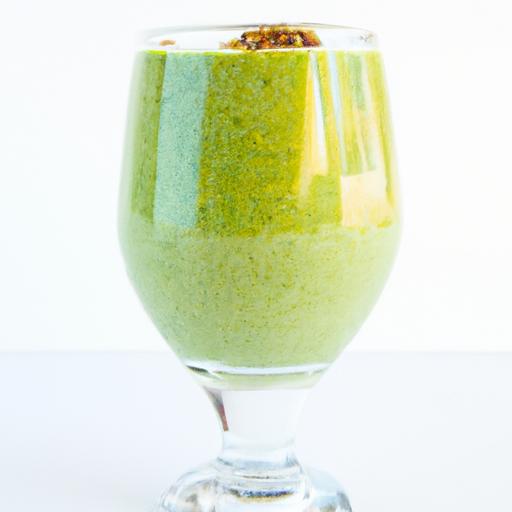
Tropical Bliss pineapple smoothies start with selecting the ideal fruit, as the natural sweetness and freshness of your pineapple set the foundation for a perfectly balanced tropical treat. A ripe pineapple has a sweet aroma from its base, a firm yet slightly yielding texture, and a vibrant golden-yellow skin. To choose the perfect pineapple, gently press the eyes-the small hexagonal sections on its skin. They should be slightly soft, indicating ripeness, but not mushy. Also, avoid green skin pineapples, as they tend to be tart and less sweet. Once you’ve selected the cornerstone fruit, your smoothie will burst with luscious tropical flavor.
Prep and Cook Time
readiness Time: 10 minutes
Blending Time: 3-5 minutes
Total Time: 15 minutes
Yield
Serves 2 (12 oz glasses)
Difficulty Level
Easy
Ingredients
- 2 cups fresh pineapple chunks (about 1 medium pineapple, peeled and cored)
- 1 cup coconut milk (for a creamy base)
- 1/2 cup Greek yogurt (optional for extra creaminess and protein)
- 1 tablespoon honey (adjust to taste, use agave for vegan option)
- 1/2 cup crushed ice (or more for desired texture)
- 1/2 lime, juiced (to brighten flavors)
- Optional tropical add-ins: 1/4 cup mango chunks, 1/4 banana, or 2 tablespoons shredded coconut
- Superfood boosters: 1 teaspoon chia seeds, 1 teaspoon spirulina powder, or a handful of fresh mint leaves
Instructions
- Prepare the pineapple: Peel and core your pineapple, then cut into roughly 1-inch chunks. Fresher pineapple ensures maximum sweetness.
- Add the base ingredients: In a high-speed blender, combine the fresh pineapple chunks, coconut milk, Greek yogurt (if using), and honey. These elements create the smooth and creamy foundation for your Tropical Bliss smoothie.
- Incorporate citrus and ice: Squeeze in the juice of half a lime, which adds a refreshing tang that balances the pineapple’s sweetness. Add the crushed ice for chill and texture-adjust based on your preferred thickness.
- Blend untill silky smooth: pulse the blender on medium speed initially, then gradually increase to high. Blend for 3-5 minutes until the mixture is perfectly creamy and homogenized, without any pineapple fibrous bits.
- Add tropical additions and superfoods: Toss in any optional add-ins like mango, banana, or shredded coconut along with chia seeds or spirulina. Blend again on low for 30 seconds to integrate flavors without losing texture.
- Taste and tweak: Sample your smoothie and adjust sweetness with more honey or add lime juice for extra zest. For a thinner smoothie, incorporate a splash of coconut water or plant-based milk.
- Serve instantly: Pour the Tropical Bliss pineapple smoothie into chilled glasses,ready to refresh your senses.
Tips for Success
- Fresh is best: Whenever possible, use fresh pineapple over canned to capture peak flavor and nutrients.
- Frozen fruit shortcut: Freeze pineapple chunks ahead of time for a chilled smoothie without needing excessive ice.
- Dairy alternatives: Substitute Greek yogurt with coconut yogurt or silken tofu for a vegan-friendly twist.
- Adjust sweetness mindfully: Pineapple varies naturally in sugar content,so add honey incrementally to avoid over-sweetening.
- Make ahead: Prepare smoothie base without ice and store up to 24 hours in an airtight container; add ice and re-blend before serving.
Serving Suggestions
Elevate your serving presentation by garnishing with a skewer of pineapple chunks and a sprig of fresh mint, enhancing both aroma and visual appeal. Rim the glasses with toasted coconut flakes or a dusting of finely ground cinnamon for an exotic touch. Serve alongside tropical snacks like coconut macaroons or plantain chips for a vibrant, island-inspired spread. For an Instagram-worthy look, layer your smoothie with chia pudding or passion fruit jelly alternative textures, bringing depth and intrigue to each sip.

| Nutrient | Per Serving |
|---|---|
| Calories | 210 |
| Protein | 5g |
| Carbohydrates | 35g |
| Fat | 6g |
Expand your tropical repertoire with our mango Coconut Smoothie Recipe for a refreshing companion drink. For expert insights on selecting pineapples, visit the Fresh Fruit Portal’s guide.
Q&A
Q&A: tropical Bliss - Your Ultimate Pineapple Smoothie Guide
Q1: What makes the pineapple smoothie the ultimate tropical treat?
A1: Pineapple smoothies burst with vibrant, sunny flavors that instantly transport you to a breezy beachside paradise. The natural sweetness and tanginess of pineapple blend perfectly with creamy bases, creating a refreshing, energizing drink that’s both appetizing and packed with nutrients. It’s like sipping sunshine in a glass!
Q2: Can I use fresh pineapple, canned pineapple, or both for my smoothie?
A2: Both work beautifully, but fresh pineapple offers the brightest, moast zesty flavor and maximum vitamin C punch. Canned pineapple is a convenient, great alternative-just opt for those packed in juice rather than heavy syrup to keep your smoothie healthy and vibrant.
Q3: What are some creative ingredients that elevate a pineapple smoothie from ordinary to extraordinary?
A3: Think beyond the basics! Adding coconut milk or Greek yogurt lends luscious creaminess, while a hint of ginger or mint adds a refreshing zing. For a tropical twist, throw in some fresh mango, banana, or even a splash of passion fruit juice. Superfoods like chia seeds or spirulina can also add a nourishing boost.
Q4: how can I make my pineapple smoothie thicker and more filling?
A4: To turn your smoothie into a satisfying meal or snack, toss in a handful of ice, frozen banana slices, or a scoop of protein powder. Nut butters and oats are fantastic too-they add texture,richness,and keep hunger at bay longer.
Q5: Are pineapple smoothies good for digestion?
A5: Absolutely! Pineapple contains bromelain, a natural enzyme that aids digestion and helps reduce inflammation. This makes pineapple smoothies great for soothing your stomach and supporting gut health.
Q6: Can pineapple smoothies be made vegan and dairy-free?
A6: Definitely! Simply swap out dairy milk or yogurt for plant-based alternatives like coconut milk, almond milk, or oat milk. These not only keep the smoothie vegan but also enhance its tropical vibe with subtle nutty or creamy notes.
Q7: How can I keep my pineapple smoothie fresh if I want to make it ahead of time?
A7: Pineapple smoothies are best enjoyed fresh, but if you need to prep in advance, store the smoothie in an airtight container in the fridge and consume within 24 hours. To preserve that vibrant flavor and texture, give it a speedy stir or shake before sipping.Q8: Any tips for balancing sweetness in pineapple smoothies?
A8: Since pineapple is naturally sweet and tangy, start by blending pineapple with unsweetened ingredients.If you want extra sweetness, try natural sweeteners like honey, agave, or a few dates. Remember,a little goes a long way-balance is key to keeping the flavors luminous and refreshing.
Q9: What’s a quick and simple pineapple smoothie recipe for beginners?
A9: Try this: 1 cup fresh pineapple chunks, 1/2 banana, 1/2 cup coconut milk, a handful of ice, and a teaspoon of honey (optional). Blend until smooth, pour into a chilled glass, and enjoy your mini tropical getaway!
Q10: Why is pineapple smoothie called “Tropical Bliss”?
A10: Because every sip feels like a blissful escape to the tropics-sunshine, ocean breeze, and lush flavors all wrapped up in one cool, creamy drink. It’s pure paradise in a cup!
In Retrospect
As you embark on your tropical smoothie adventures, remember that the humble pineapple is more than just a sweet treat-it’s a burst of sunshine, a vitamin-packed powerhouse, and the perfect canvas for endless creativity. Whether you stick to classic blends or dare to experiment with exotic twists, your blender holds the key to liquid paradise. So, blend boldly, sip slowly, and let every pineapple smoothie transport you to a blissful island getaway-no passport needed. Here’s to your ultimate tropical refreshment, one delicious sip at a time!
Sweet Surprise: Your Guide to Chocolate covered Strawberries Delivery begins with understanding that freshness and impeccable quality transform a simple fruit into a luxurious bite of delight. As someone who’s styled and created countless sweet moments, I’ve learned that the magic truly starts at the selection stage-only the juiciest, ripest strawberries paired with the finest chocolate yield that unforgettable experience you crave.
Prep and cook Time
Planning: 15 minutes
Chilling: 30 minutes
Total Time: 45 minutes
Yield
Serves 6-8 (approximately 18-24 strawberries)
Difficulty Level
Easy – Perfect for both beginners and seasoned chocolatiers
Ingredients
- 24 large fresh strawberries, washed and thoroughly dried (room temperature)
- 8 oz high-quality bittersweet chocolate (70% cocoa recommended), chopped
- 4 oz white chocolate, optional for drizzling
- 1 tsp coconut oil or unsalted butter (to smooth melting)
- Optional toppings: finely chopped nuts, edible gold leaf, shredded coconut, or sea salt flakes
Instructions
- Prepare the Strawberries: Gently rinse your strawberries and pat dry with paper towels. Ensuring they are completely dry is crucial; any moisture will cause the chocolate to seize.
- Melt the Bittersweet Chocolate: In a heatproof bowl, place chopped bittersweet chocolate and coconut oil. Melt using a double boiler method or in 20-second bursts in the microwave, stirring frequently for smoothness.
- Dip the Strawberries: Hold each strawberry by the green leaf and dip into the melted chocolate, swirling to coat 3/4 of the strawberry. Shake off excess and place on a parchment-lined baking sheet.
- Chill the Dipped Strawberries: Place the chocolate-coated berries in the fridge for 20 minutes to set the chocolate firmly.
- Decorate with White Chocolate: Melt the white chocolate using the same method, then use a small spoon or piping bag to drizzle thin lines over the dipped strawberries for contrast and elegance.
- Add Toppings: While the chocolate is still wet, sprinkle finely chopped nuts, sea salt, or edible gold leaf to elevate each bite to a visual and flavorful masterpiece.
- Final Chill: Refrigerate for an additional 10 minutes to let all decorations set perfectly before serving or packaging for delivery.
Tips for Success
- Choose your delivery service based on freshness guarantees. A reputable vendor will ship strawberries harvested within 24 hours and use insulated packaging to maintain berry integrity.
- Room temperature strawberries absorb chocolate better but avoid warm surfaces which cause condensation.
- Experiment with chocolate types: Milk, white, or ruby chocolates provide different flavor profiles, but always opt for couverture or high cocoa content for smooth finish and snap.
- Make-ahead tip: Prepare and refrigerate dipped strawberries up to 6 hours before gifting or serving; avoid freezing as strawberries lose texture.
- Keep your strawberries dry at every step – this is key to a glossy chocolate coating.
Creative Presentation ideas to Impress
Wrap your Sweet Surprise in a luxe gift box lined with parchment or colored paper. Add a personalized tag and sprinkle edible glitter over the box’s tissue paper for a hint of sparkle. Alternatively, present strawberries on a wooden platter nestled in fresh mint leaves or place them in transparent cellophane bags with curled ribbons for an elegant party favor look. For an elevated dessert table, pair with mini jars of champagne or sparkling wine-sweet, decadent bites perfect to complement bubbly.
Nutritional Data Per Serving
| Calories | Protein | Carbohydrates | Fat |
|---|---|---|---|
| 160 | 2g | 22g | 8g |
For more tips on selecting the finest chocolate and fruit pairings,check out our Chocolate Pairing Guide. For scientific insights on freshness and berry storage, visit the USDA’s official website.

Q&A
Sweet Surprise: Your Guide to Chocolate Covered strawberries Delivery – Q&A
Q1: What makes chocolate covered strawberries the perfect gift?
A1: Chocolate covered strawberries combine the luscious freshness of ripe berries with the rich, velvety allure of chocolate. This duo creates a sensory delight that feels both indulgent and thoughtful-a sweet surprise that says “I care” in every bite. Whether it’s for a birthday, anniversary, or just because, they’re a universally loved treat that brightens any occasion.
Q2: How does the delivery process ensure strawberries arrive fresh and flawless?
A2: Reputable delivery services use specially designed insulated packaging and chilled gel packs to maintain optimal temperature. Strawberries are hand-dipped and arranged with care, then packaged to avoid bruising or melting during transit. Some providers offer same-day or express options, minimizing time in transit and guaranteeing sweetness upon arrival.
Q3: Can I customize my chocolate covered strawberries order?
A3: Absolutely! Many chocolatiers and delivery services allow you to choose from a variety of chocolate coatings-dark, milk, white, or even ruby chocolate. You can add toppings like crushed nuts, drizzled caramel, sprinkles, or edible glitter. Some even offer personalized messages on the box or chocolate, turning each delivery into a unique, heartfelt gift.
Q4: What occasions are best suited for chocolate covered strawberries delivery?
A4: From Valentine’s Day and Mother’s day to weddings, graduations, or corporate gifts, chocolate covered strawberries fit perfectly. They also make a charming surprise for “just because” moments-turning an ordinary day into something remarkable. their elegant appearance and delicious taste make them ideal for celebrations big and small.
Q5: Are there any tips for enjoying delivered chocolate covered strawberries at their best?
A5: For the freshest taste, enjoy your chocolate covered strawberries within 24-48 hours of delivery. keep them refrigerated but allow them to come slightly closer to room temperature before eating to fully appreciate the chocolate’s texture and flavor. And of course, savor every bite slowly-this is a fleeting luxury meant to be enjoyed mindfully!
Q6: how can I choose the best delivery service for chocolate covered strawberries?
A6: Look for companies with excellent customer reviews, transparent sourcing practices, and clear delivery guarantees. Quality matters-freshness, presentation, and promptness make all the difference. Some services also offer tracking and flexible scheduling,helping ensure your sweet surprise arrives exactly when you want it.
With this guide, ordering chocolate covered strawberries online transforms from a simple purchase into a thoughtful experience, delivering joy, flavor, and a touch of magic right to your door. Ready to unwrap your sweet surprise?
Final Thoughts
As you unwrap the world of chocolate-covered strawberries delivery, you’ll discover that this sweet surprise isn’t just a treat-it’s an experience crafted to delight the senses and brighten any occasion. From selecting the perfect berry to choosing decadent chocolate coatings, your guide ensures every bite is a moment of joy delivered right to your doorstep. Whether for a romantic gesture, a thoughtful gift, or simply an indulgent self-treat, embracing the convenience and charm of delivered chocolate-covered strawberries transforms ordinary days into extraordinary memories. So go ahead, savor the sweetness and let the luscious combination of ripe strawberries and rich chocolate make every festivity a little more deliciously unforgettable.